Click here to download GStreamer for Desktop on your Laptop/PC.
Make sure to download the MinGW version, and install both runtime and development.
When in doubt, install the 64-bit version, as this is more common.
Gstreamer would automatically install in the D drive if you have more than one drive on your PC. You can change it to the C drive when you do custom installation.If you install it on the D drive, just keep note of that when you set up your environment variables below.
2
Configure Environment Variables Setup
1
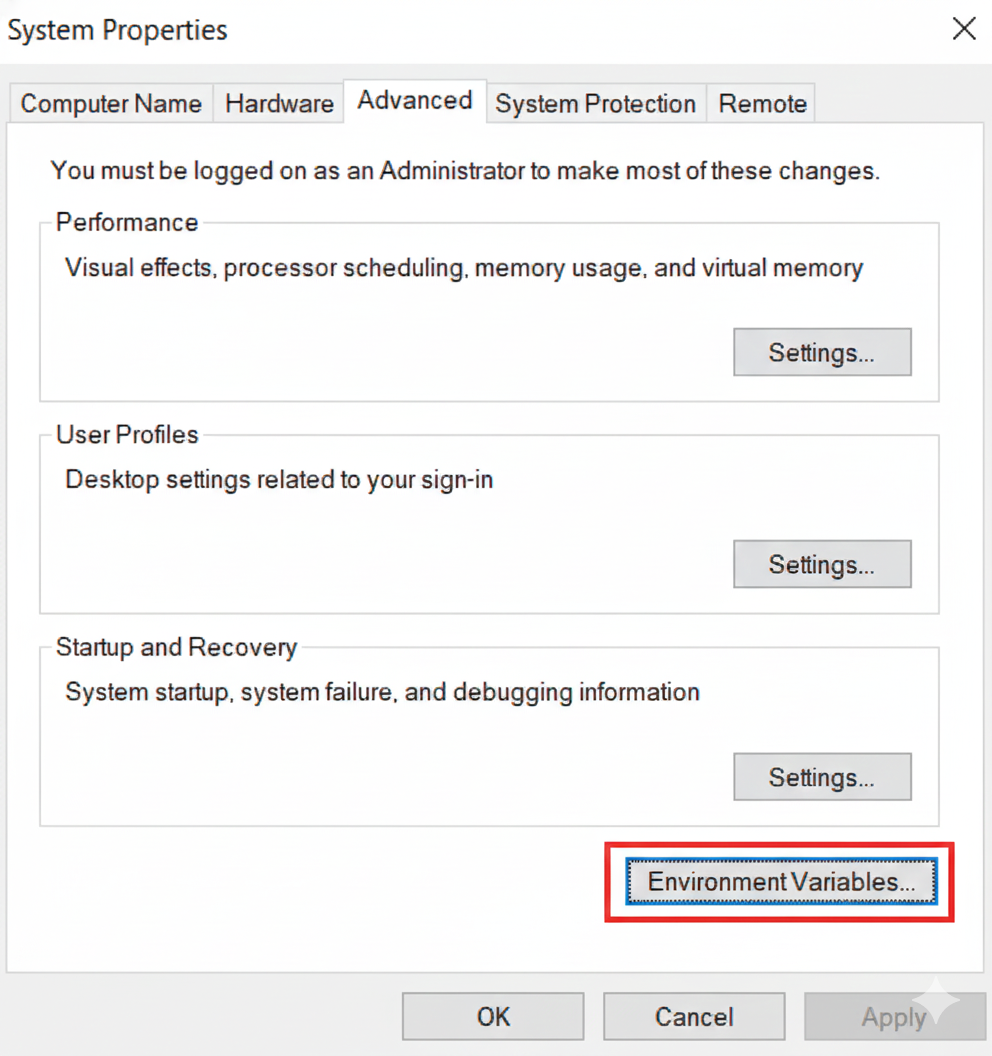
To get to Environment Variables, press Win + R
2
Type:
SystemPropertiesAdvanced
and press Enter
3
Click Environment Variables...
4
Highlight the variable Path under User variables by clicking on it and then click Edit… under the User variables box.
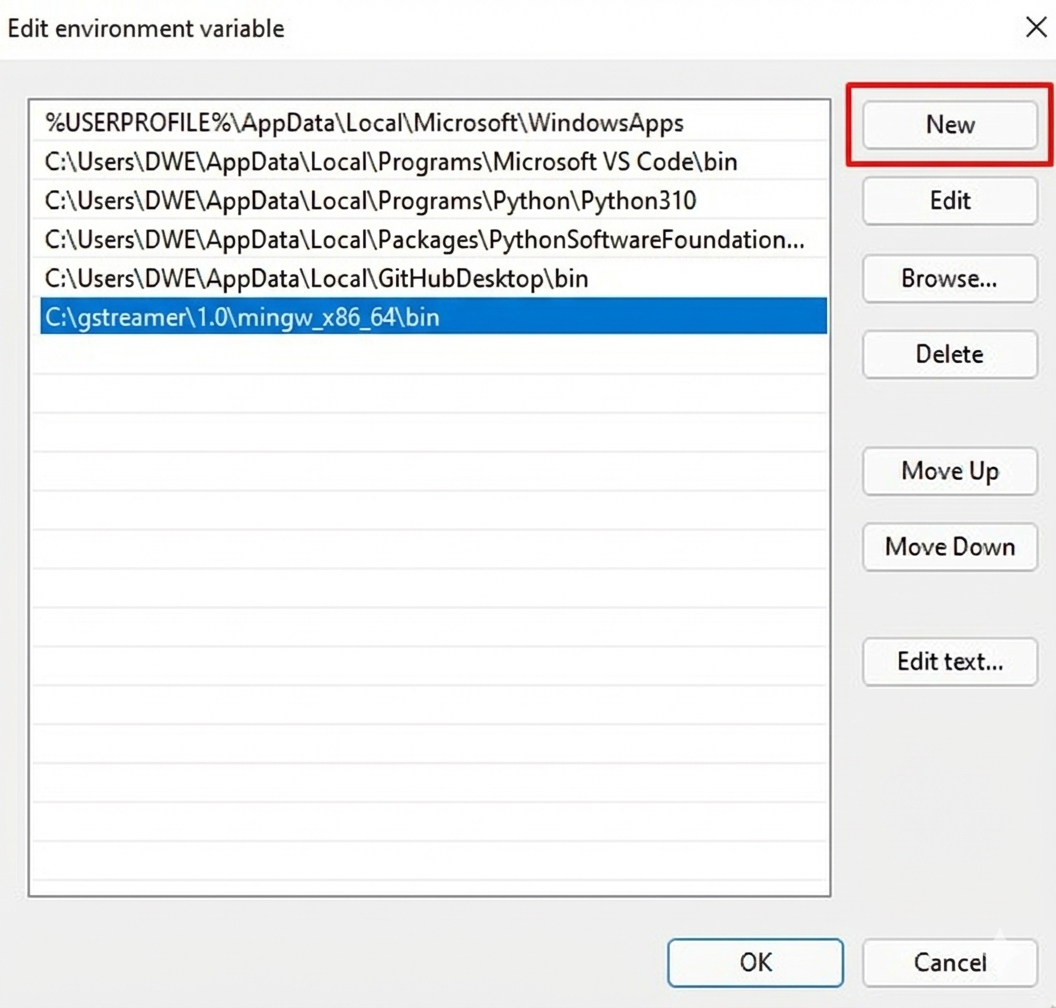
5
A new window should pop up and you want to click on New and add a path to your bin folder to the list. In this case, it’s:
C:\gstreamer\1.0\mingw_x86_64\bin
The path to your bin may vary and can be found from where you installed Gstreamer in previous steps.
6
After that, click OK on both windows and you should be ready to go!
3
Success!
You should now have Gstreamer setup and ready for next steps!
To verify the GStreamer setup, open CMD and run the following:
gst-launch-1.0 --version
This should result in an output like:
gst-launch-1.0 version 1.16.2GStreamer 1.16.2https://launchpad.net/distros/ubuntu/+source/gstreamer1.0
In this case the location of my obs-gstreamer.so is ~/Downloads/linux/obs-gstreamer.so, be sure to replace it with the path where you extracted the obs-gstreamer.so file.Remember to replace the /usr/lib/x86../obs-plugins with your obs-plugin folder path as well.
From the .zip file extract and locate the obs-gstreamer.dll file within the windows folder.
3
In another file explorer, locate the obs-plugins\64-bit folder (or whichever bit size you installed)
This is likely to be similar to C:\Program Files\obs-studio\obs-plugins\64bit.If you can’t find it, right-click your OBS Studio shortcut on the desktop or Start Menu, select Open file location, and navigate up one level to the main obs-studio folder, where you’ll find the obs-plugins folder.
4
Move the .dll file into the obs-plugins\64-bit folder.
Windows will likely ask for Administrator permission to move files into C:\Program Files. Click Continue or Yes.
5
Restart OBS Studio should you have it running.
5
Setup Stream
The process from here is pretty much identical across operating systems.
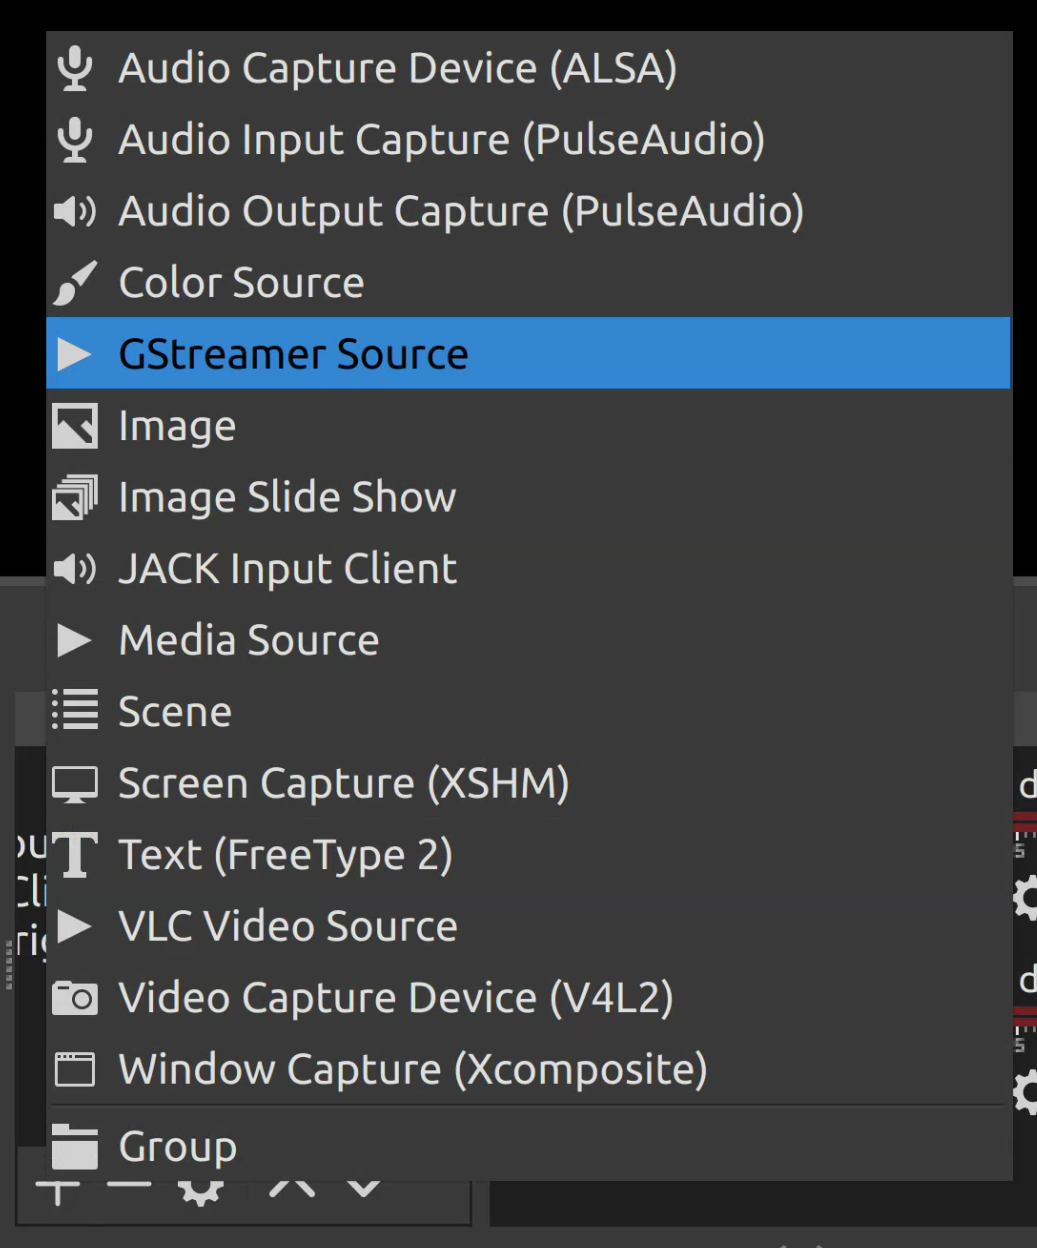
1
Within OBS Studios, under the Sources tab, press the + button and add a Gstreamer Source.Under Create new name it whatever you’d like and confirm.
2
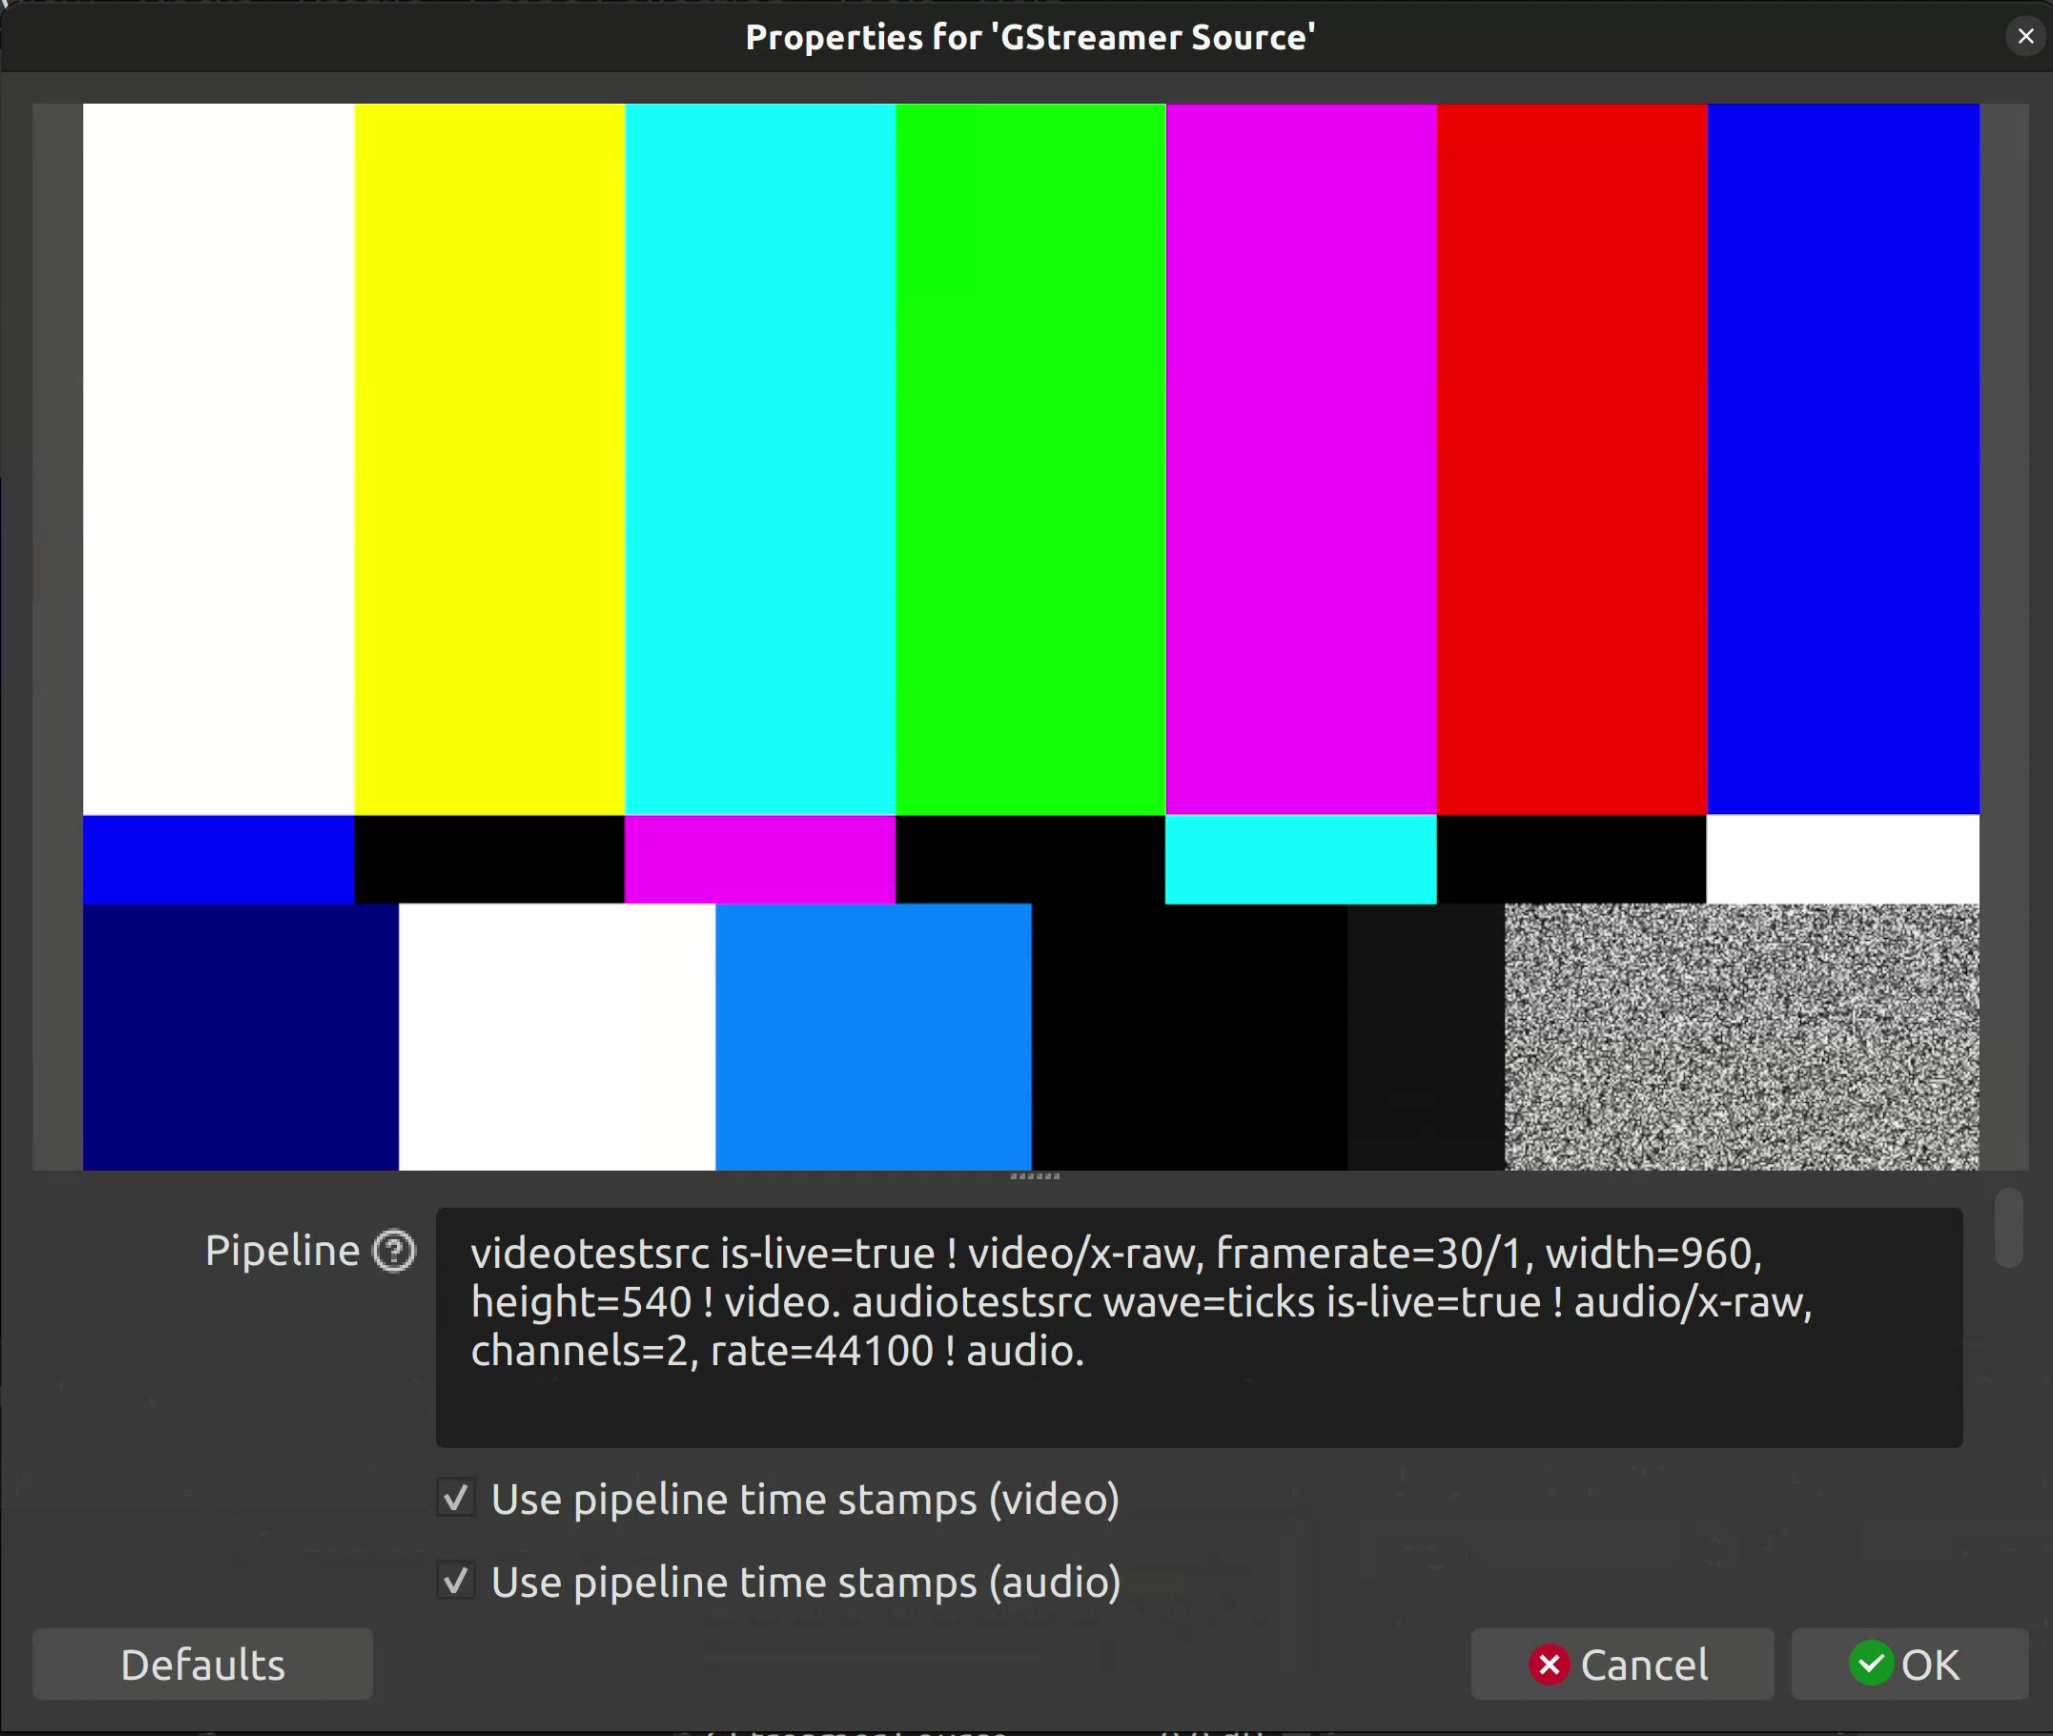
You’ll next be prompted with a window like this:Within the Pipeline input, replace the existing code with:
Replace the 5600 in port=5600 with the port being streamed to from dweOS 2.
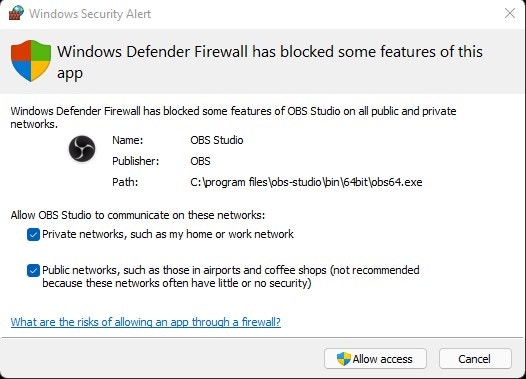
Windows may prompt you with a warning, and in that case, please enable OBS for both private and public networks
6
Adding Additional Streams
If you would like to add more than one stream, simply repeat from step 5.
Remember to replace the port number as specified in the previous step!
More streams should show up on the main window of OBS. You may click on the video display to resize to your preference.
Here is an example of a setup with 3 exploreHDs!
7
Optimization
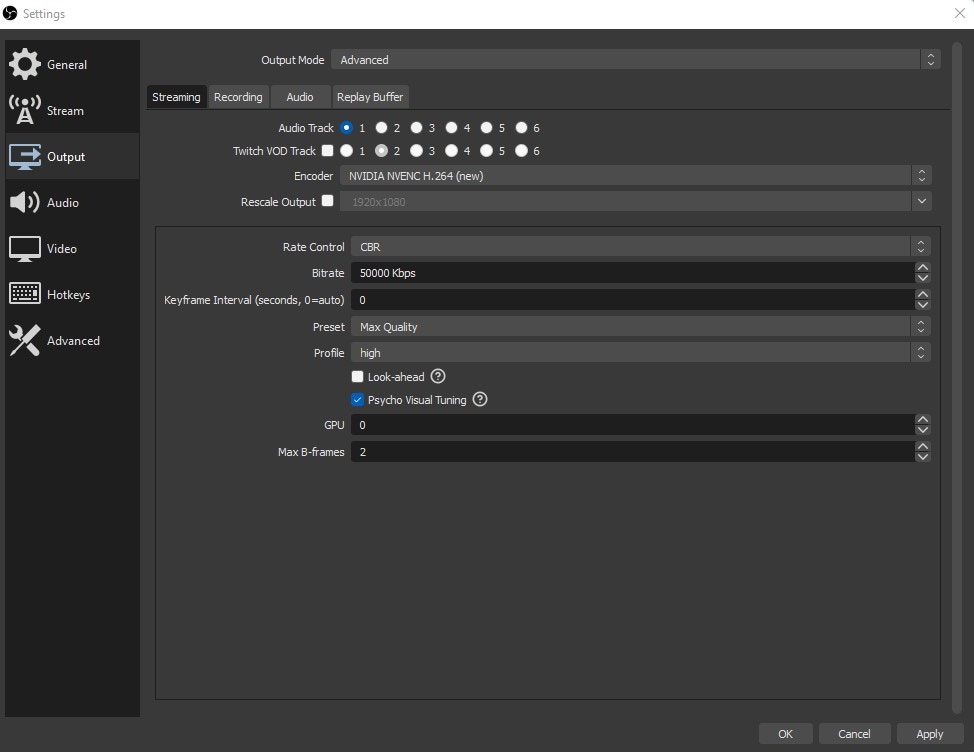
For optimalizing the setup, please navigate to File > Settings > Output.Within output, set Output Mode to Advanced to access additional settings.Given each camera is set to 10Mb/s as the default bitrate, the streaming and recording should match that. In the case of 3 cameras, providing at least 30Mb/s of streaming and recording bitrate should provide you with high quality.
8
Success!
Wonderful! You should now see the streams configured with OBS Studio.
Warning:
With a 3 stream setup, this configuration will rely on a powerful GPU to run
the videos smoothly. We found that OBS is a lot more intensive to run when
compared to Discovery. Make sure your laptop is powerful enough to run it or
you can lower the resolution of some of the streams to 720p.