

dweOS no longer supports Wi-Fi. Networking is configured entirely through
wired Ethernet interfaces and NetworkManager connection profiles.
Accessing the Page
Navigate toNetwork in the sidebar.
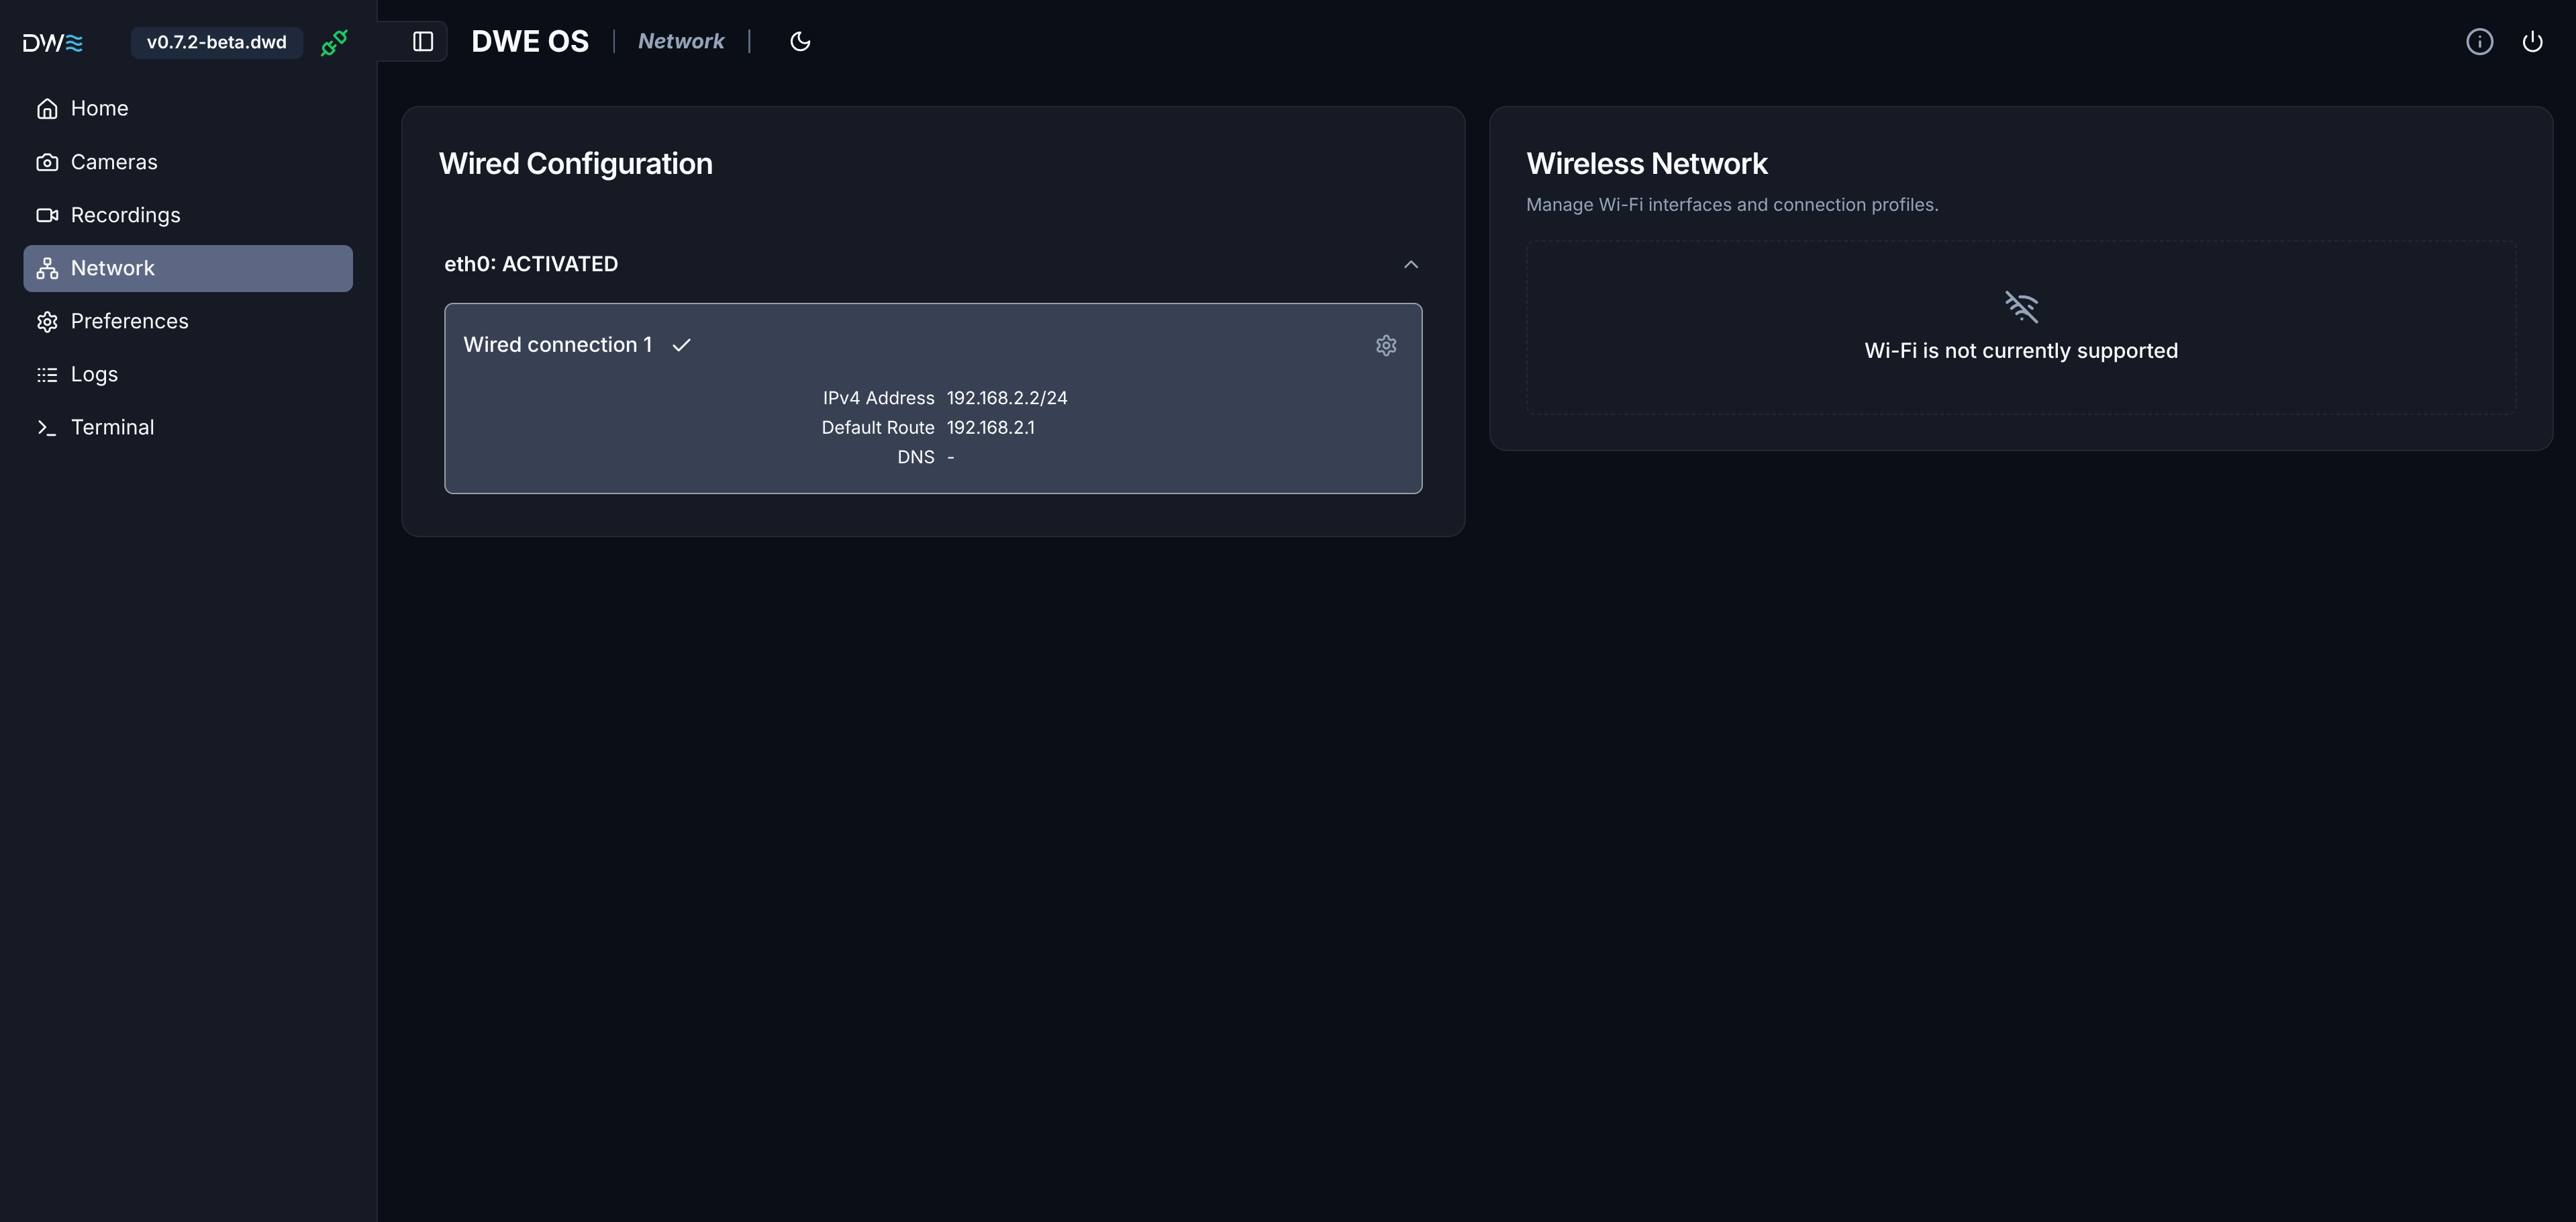
Wired Configuration
Shows every detected Ethernet interface, its state, and the connection
profiles available to it.
Wireless Network
WiFi is not currently supported by dweOS. If you require WiFi support, please submit an issue.
Core Concepts
dweOS manages networking through NetworkManager:- Interface: a physical wired port (e.g.
eth0) - Connection Profile: a saved network configuration that can be attached to a compatible interface. An interface can have several profiles available to it, but only one can be active at a time. By default, units shipped with dweOS preinstalled will only have one available profile (Wired connection 1).
Interface List
Each interface appears as a collapsible section showing its name and current state:Because it is required to connect over the network to view dweOS, you may get disconnected after network configuration. This means outputs will be less verbose than usual.
Connection Profiles
Underneath each interface is the list of connection profiles compatible with it. The active profile is highlighted and shows a checkmark, along with its live network info:- IPv4 Address: the address(es) currently assigned, with prefix (e.g.
192.168.2.2/24) - Default Route: the gateway currently in use, if this profile is set to provide the default route
- DNS: the DNS servers currently in use
Editing a Profile
Click the gear icon on a profile to open its editor.1
Choose the IPv4 method
- Automatic (DHCP): the interface requests an address from a DHCP server.
- Manual (Static IP): you provide the address, gateway, and DNS yourself.
2
Configure static settings (Manual only)
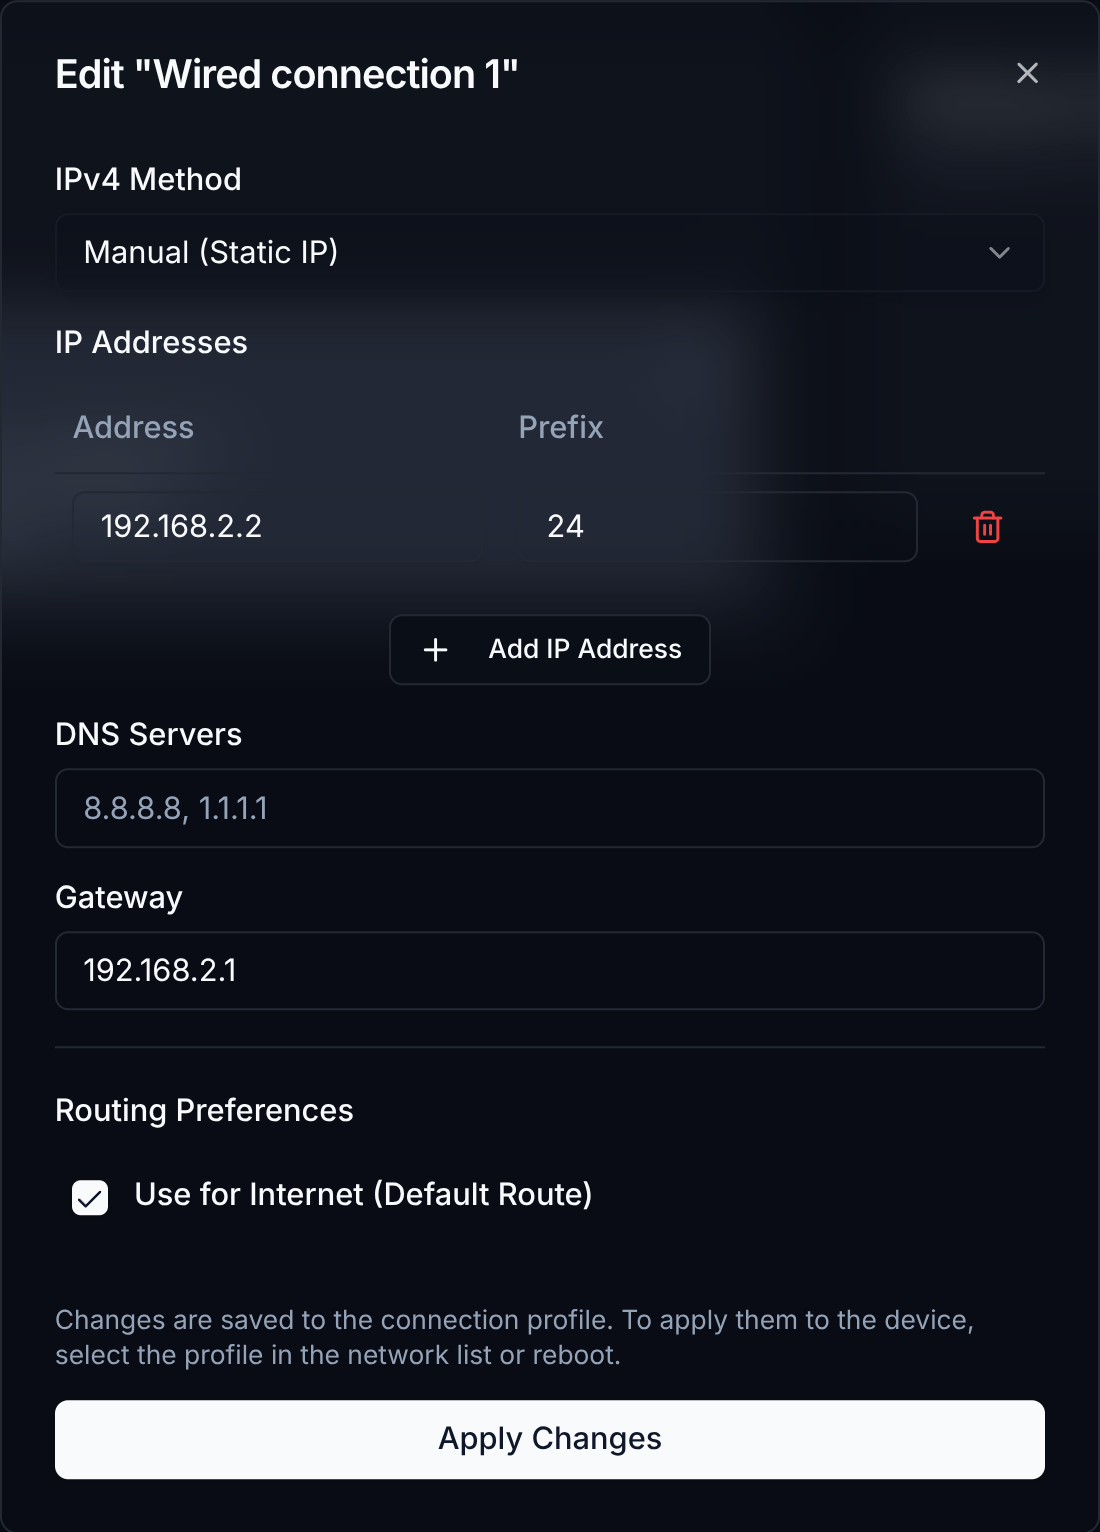
- IP Addresses: a table of address/prefix pairs. Use the Add IP Address button to add another entry, or the trash icon to remove one.
- DNS Servers: a comma-separated list (e.g.
8.8.8.8, 1.1.1.1) - Gateway: the gateway IP for this profile
3
Set routing preference
The Use for Internet (Default Route) checkbox controls whether this
profile is allowed to provide the system’s default route. Leave this checked if you are unsure.
4
Apply Changes
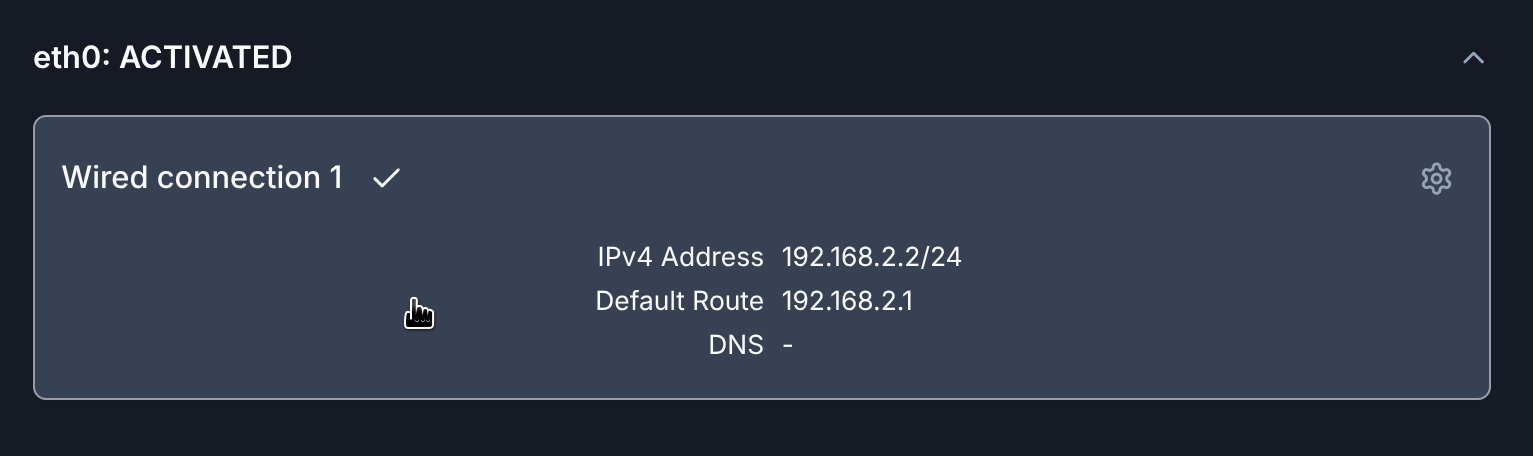
Click anywhere inside the profile to activate it.
Saving does not immediately apply the change to a live interface.
To apply it, select the profile in the interface’s list (this
re-activates it), or reboot the system.