Documentation Index
Fetch the complete documentation index at: https://docs.dwe.ai/llms.txt
Use this file to discover all available pages before exploring further.
Hardware Connections
First, connect both cameras to the SVC Pro module. If you plan to use strobe control, ensure your right explore3D camera is plugged into the connector marked with black ink. Once everything is connected, load the WebUI using your system’s IP address to verify that both cameras are detected.
Choosing Your Streaming Setup
If you are a DeepWater Desktop (DWD) user, you do not need to start your stream through dweOS. dweOS streaming is specifically designed for Discovery or your own custom software integrations.Maximizing Image Quality
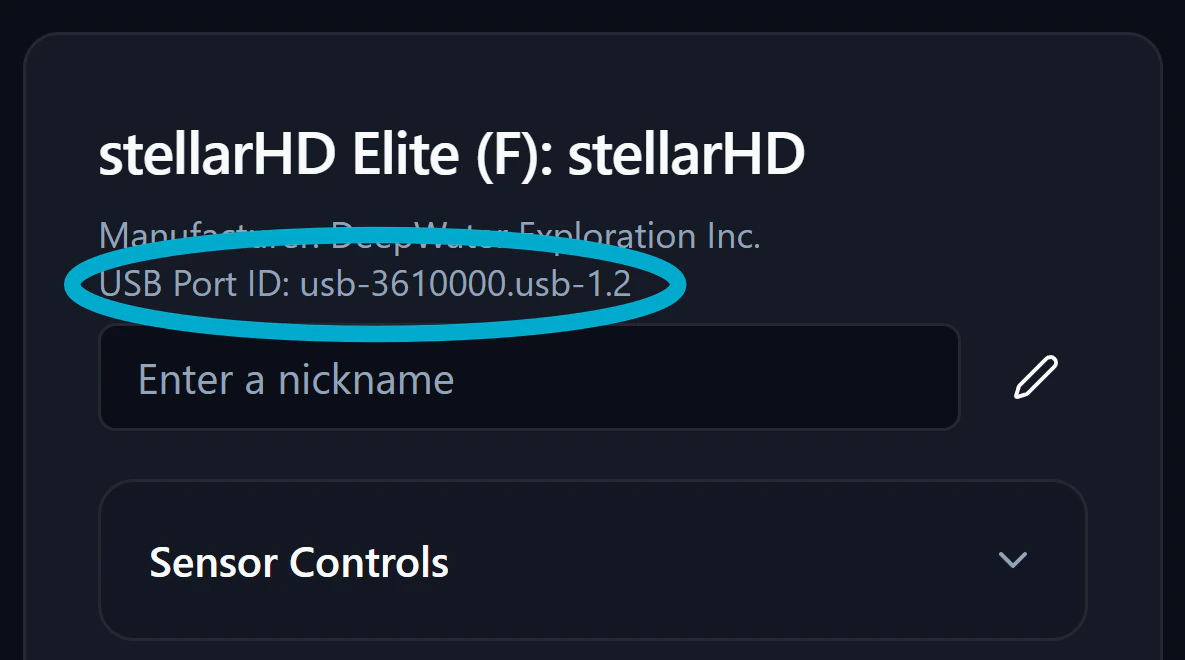
The SVC Pro module features 4 connectors, powered by 2 separate USB buses (each bus drives 2 ports). dweOS Pro displays a USB Port ID for each camera, indicating exactly which bus and port you are using. The USB Port ID is formatted with the bus number first, followed by the port number.- Optimal Setup Example (Separate Buses):
- Camera 1:
usb-3610000.usb-1.2(Bus 1, Port 2) - Camera 2:
usb-3610000.usb-2.2(Bus 2, Port 2)
- Camera 1:
- Sub-optimal Setup Example (Same Bus):
- Camera 1:
usb-3610000.usb-1.2(Bus 1, Port 2) - Camera 2:
usb-3610000.usb-1.1(Bus 1, Port 1)
- Camera 1:
Organization & General Settings
Once your cameras are plugged into the optimal ports, you can assign them nicknames to keep things organized.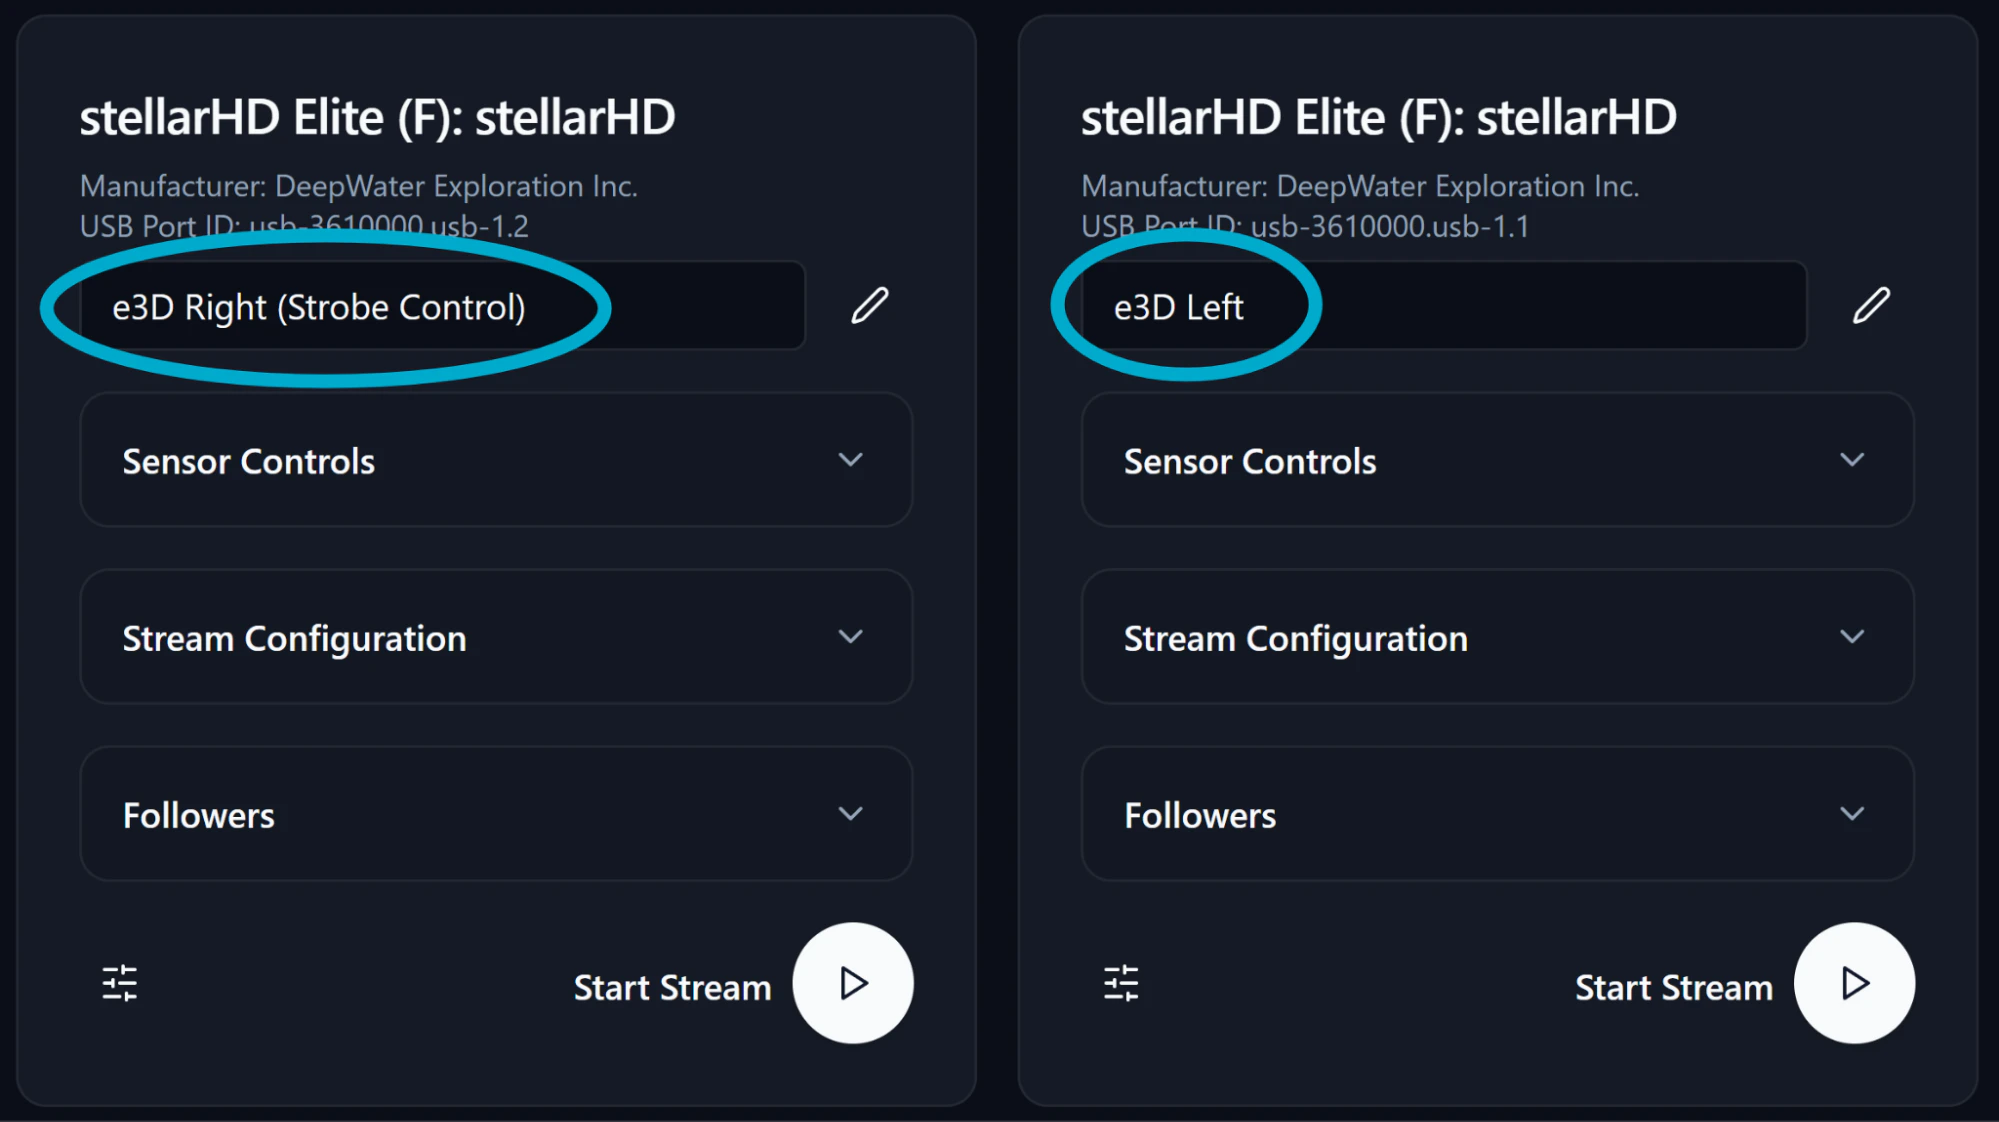
Framerate (FPS)
We recommend streaming at 15 FPS. This is the sweet spot for keeping file sizes manageable and bandwidth stable, while still providing a smooth piloting experience.DeepWater Desktop users should set their stream to 15 FPS directly inside DWD, not in dweOS.
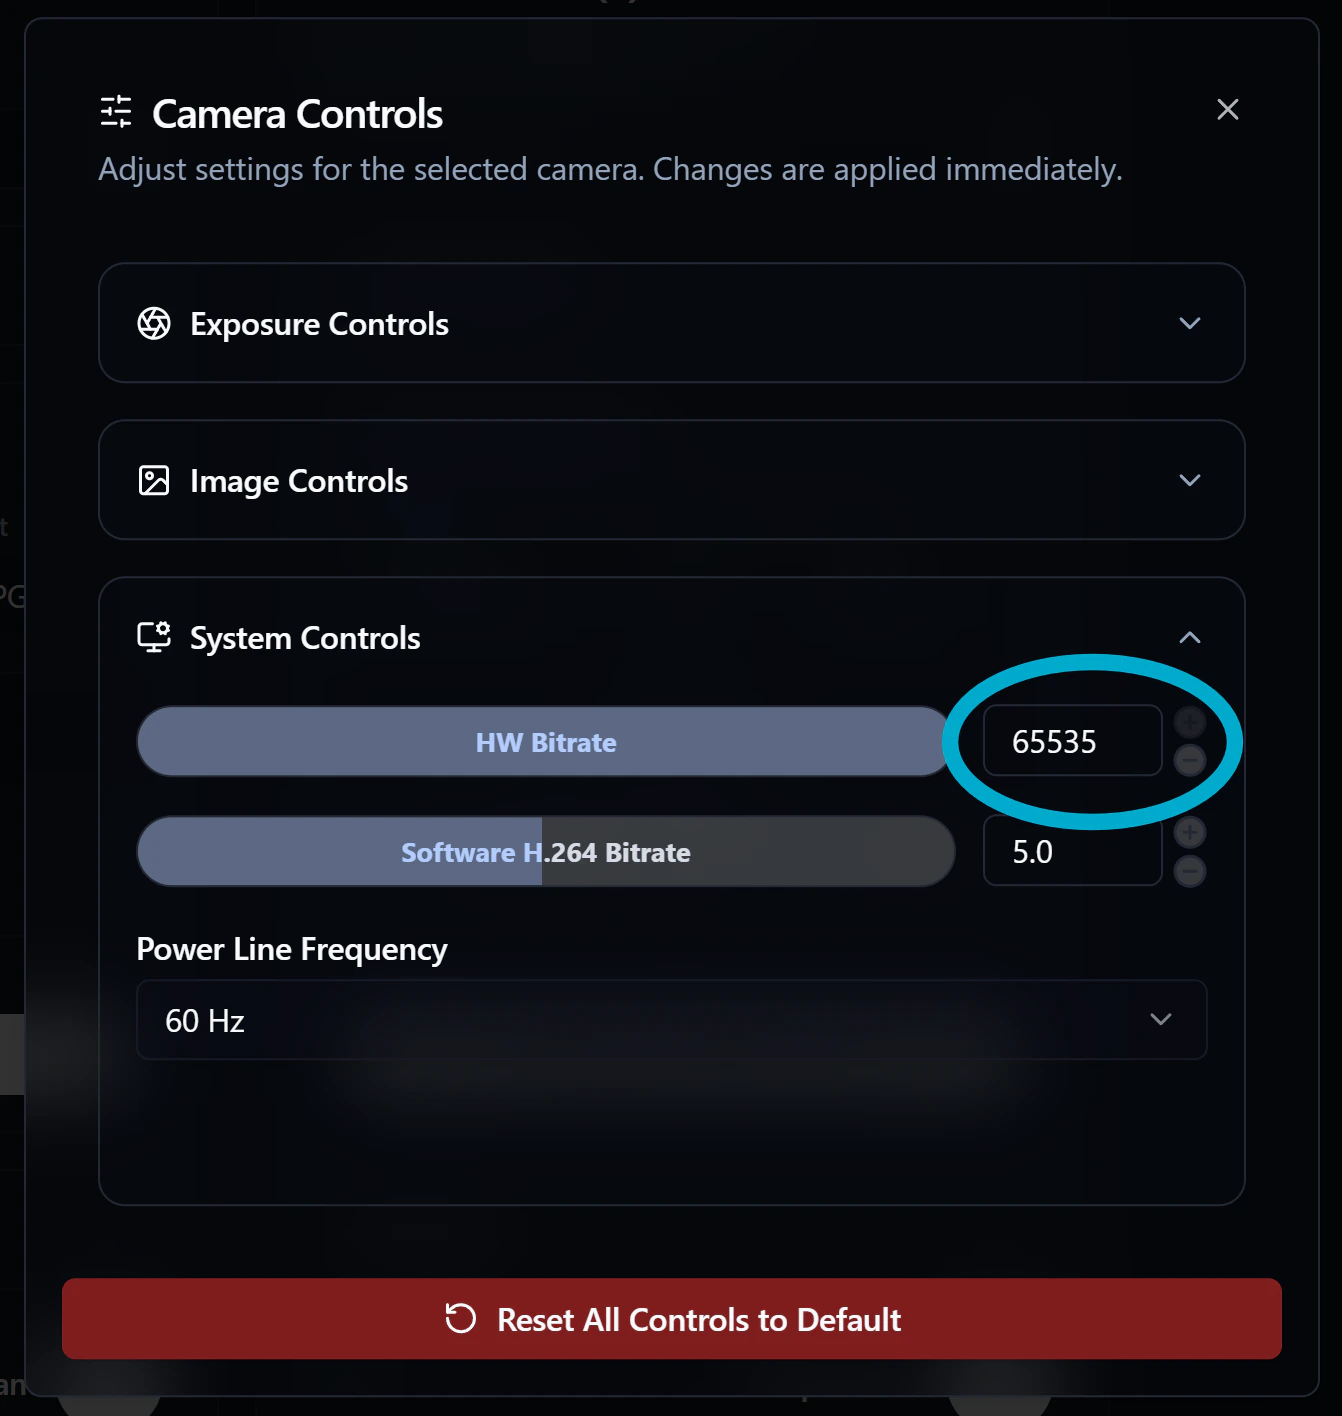
Bitrate
For the highest JPEG image quality in dweOS, navigate to Camera Controls and look for System Controls. Find the HW Bitrate option and set it to the highest value. This setting will save automatically for your next restart. Repeat this process for both cameras.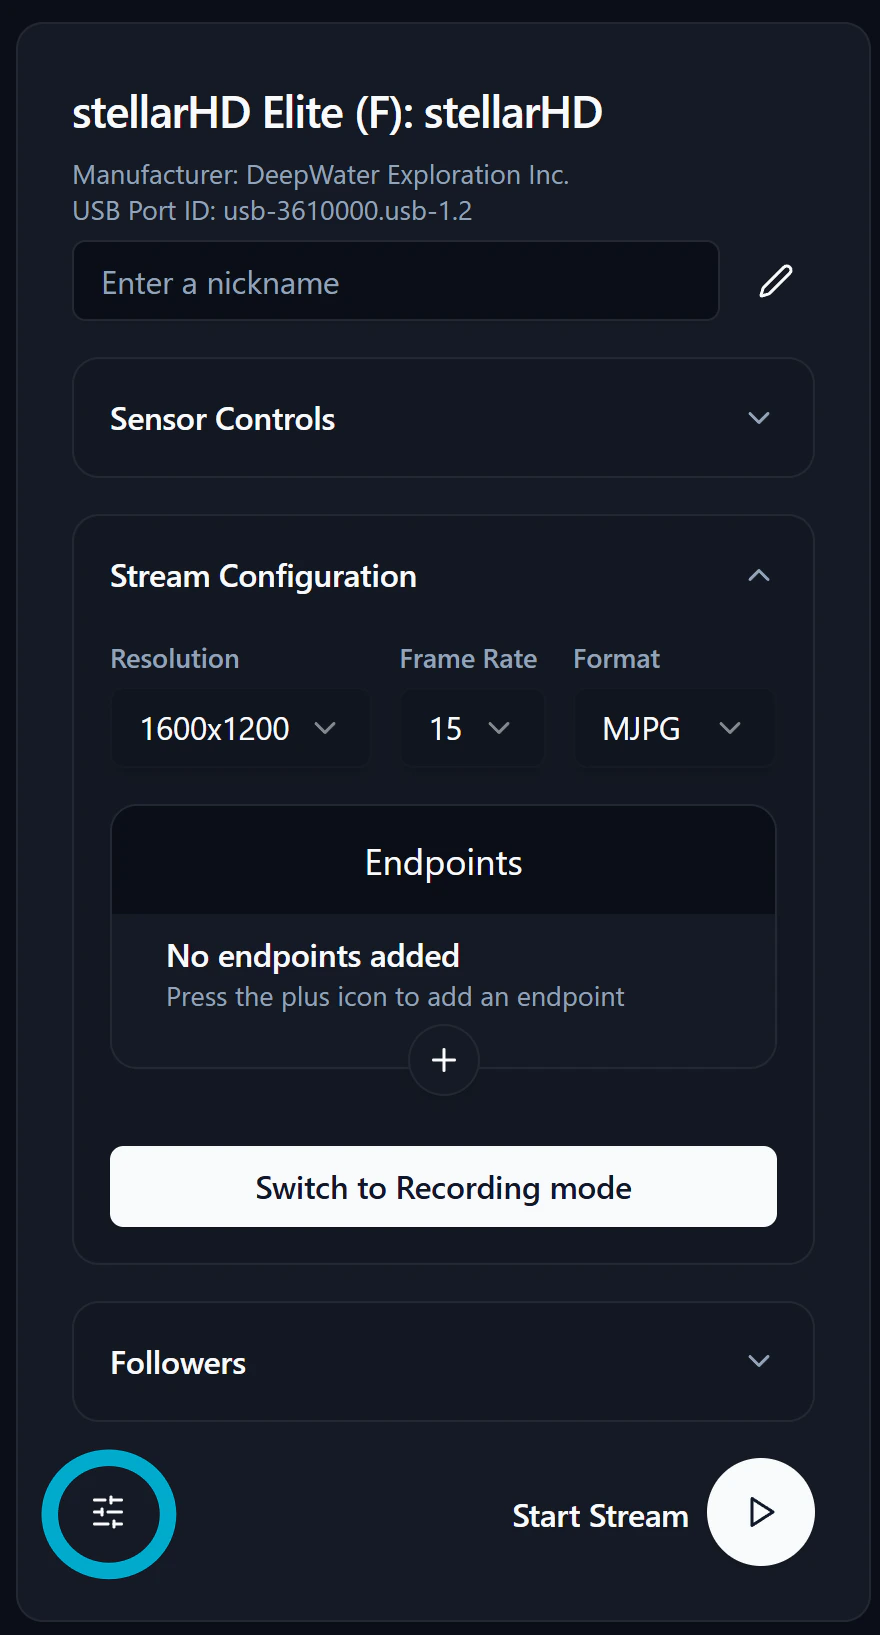
Exposure & Strobe Control
Auto Exposure works well for most standard applications. However, if you are using strobe lights or simply want full manual control, you can disable the auto exposure toggle under Sensor Controls in dweOS.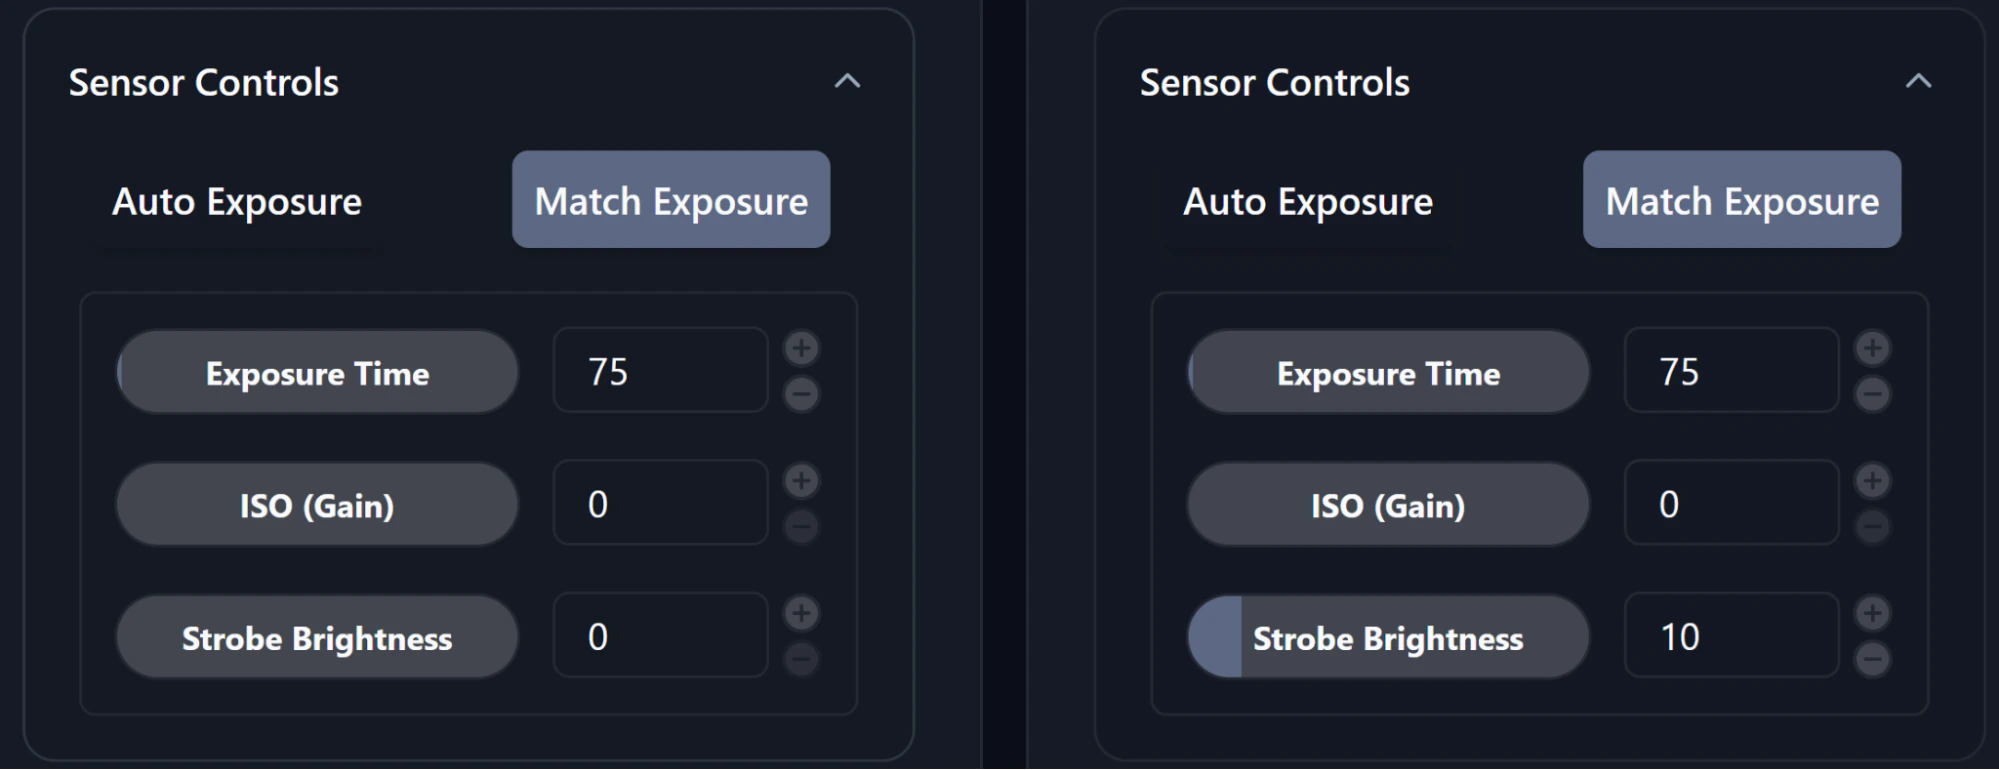
Pro Tips for Manual Control
- Match Exposure: Turn this on for both cameras to simplify operation and keep your lighting consistent.
- Strobe Brightness: The right camera on the explore3D is a stellarHD Elite, which controls your strobe. Use the right camera’s sensor controls to balance your strobe brightness against your exposure time.
- 3D Reconstruction: For the cleanest, sharpest 3D models, keep your ISO as low as possible to reduce noise, and keep your exposure time low to prevent motion blur. Strobe lights are highly recommended to help you achieve this in deep water.
- Dark Environments: In pitch-black water, your exposure time is essentially dictated by your strobe. Lock your exposure time to a fixed, low value, and simply adjust the strobe brightness to get the lighting you need.

Troubleshooting
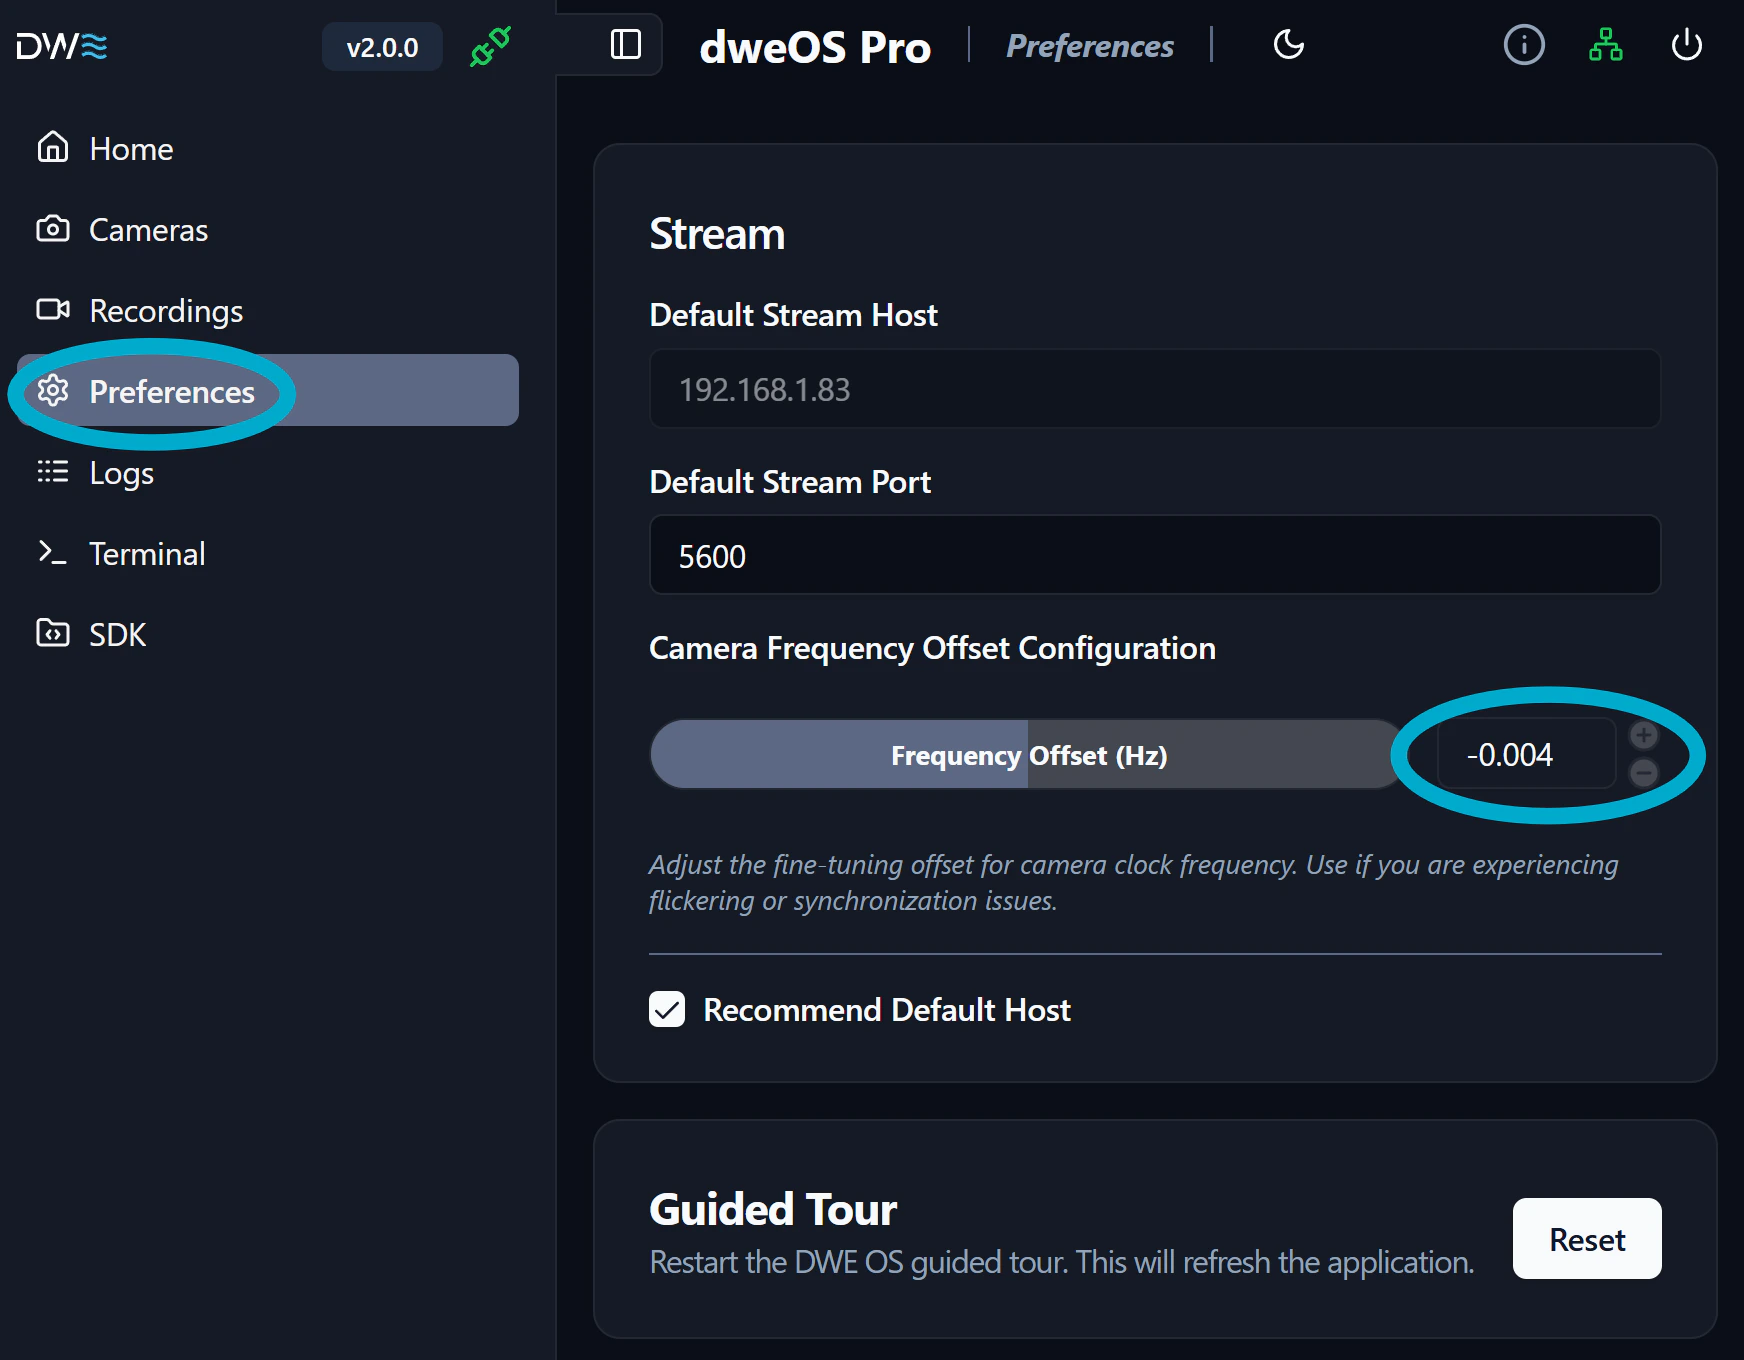
Are you noticing odd frames, overexposure in bright environments, or an auto-exposure that feels sluggish? This is usually caused by an incorrect frequency offset. To fix this, head over to Preferences in dweOS and fine-tune your frequency offset until the image stabilizes. Start with a low change value like-0.004 and adjust the number until the issue is resolved.