

電気的 および ソフトウェア の両方の同期が必要です。詳細な手順については以下を参照してください。
電気配線ガイド
- Leader-Follower モード
- Follower-Only モード(外部クロック)
概要
このモードは 外部クロック信号を使用しない 構成向けに設計されています。1 台のカメラをleader モード(同期信号を出力)にし、残りのすべてのカメラを follower モードで使用します。Leader/Follower ファームウェアガイド
Leader モードと Follower モード間のカメラファームウェアの更新方法のガイドはこちらをクリックしてください。


配線

例
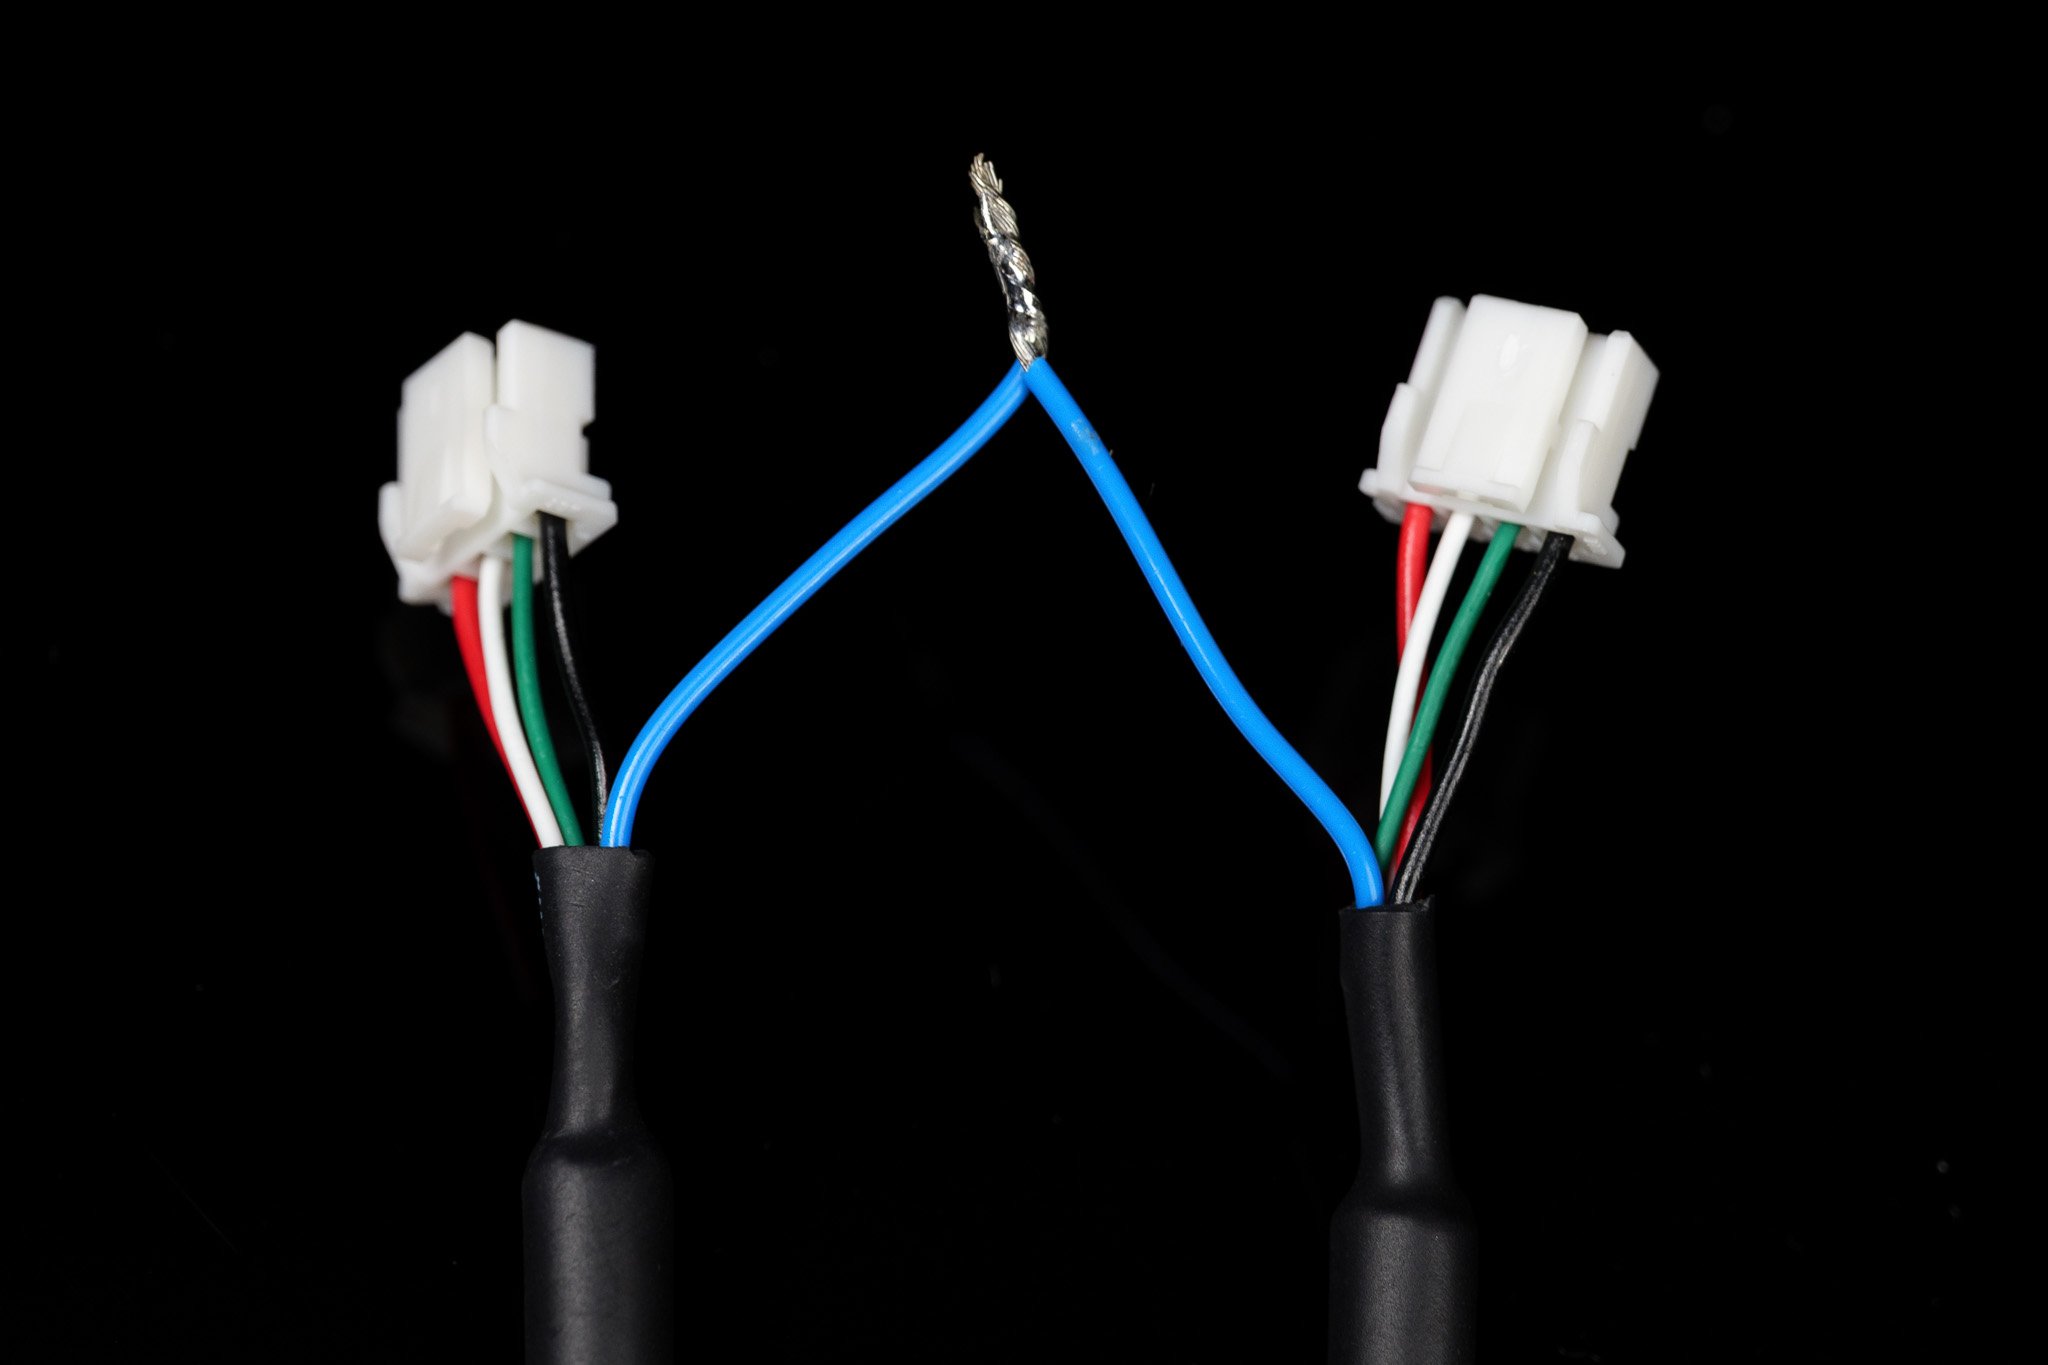
フレーム同期のために接続された 2 台のカメラの配線例。
概要
このモードは、すべてのカメラの同期信号を出力するために 外部クロック信号を使用する 構成向けに設計されています。このモードでは、すべてのカメラをfollower モードに設定する必要があります。Leader/Follower ファームウェアガイド
Leader モードと Follower モード間のカメラファームウェアの更新方法のガイドはこちらをクリックしてください。


配線
外部フレーム同期の仕様については、お使いのデバイス固有の製品ページを確認してください。
外部クロック信号の生成
Arduino 連携
現在、この構成で動作が 確認されている ボードは Arduino Uno (ATmega328P) のみです。
1
PWM ライブラリをダウンロードする
PWM ライブラリのソースコードをここからダウンロードしてください: ArduinoPWM v1.0.0
2
.ZIP ライブラリを追加する
ダウンロードした 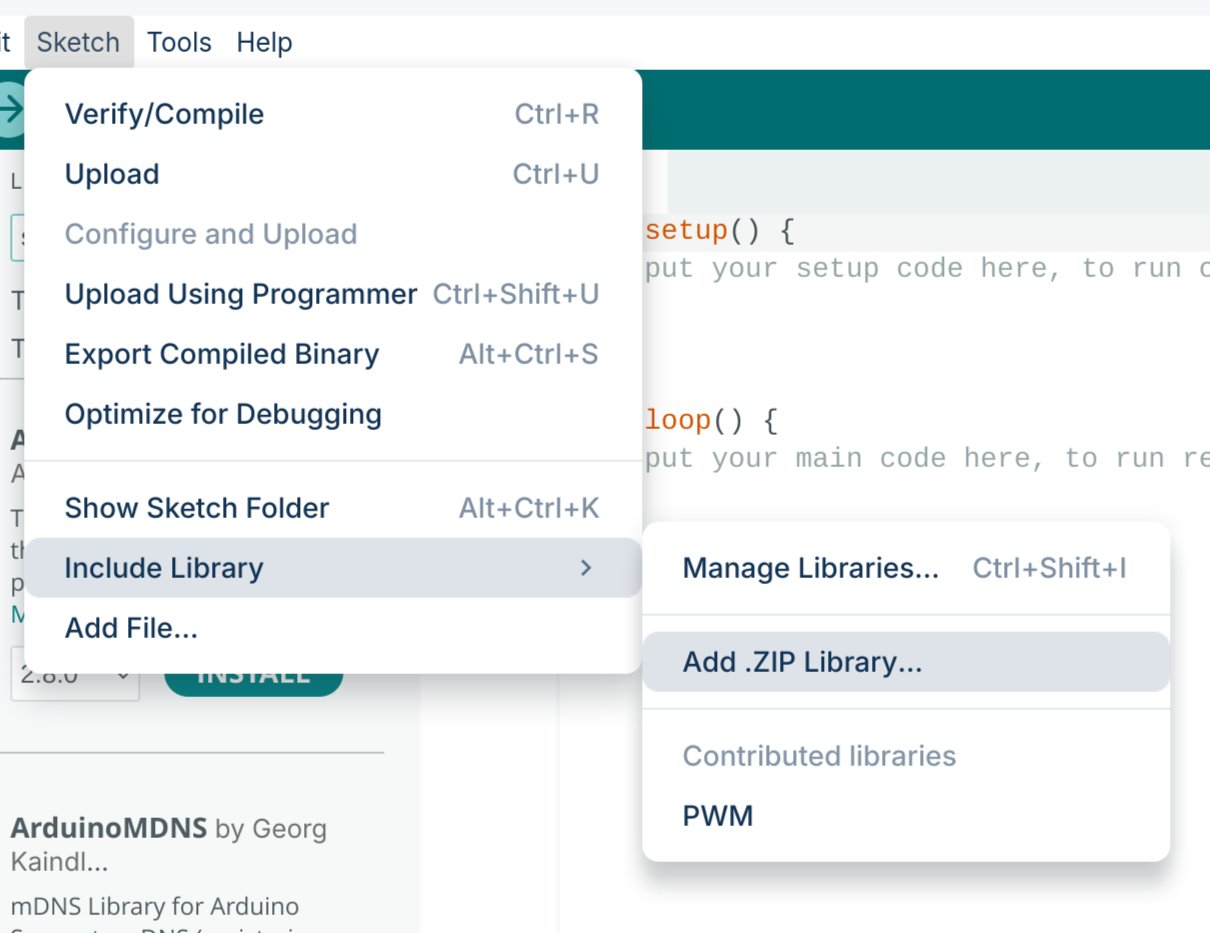
.ZIP ライブラリを Arduino IDE にインポートします。3
スケッチをアップロードする
以下の 2 つのスケッチのいずれかを Arduino にアップロードします。このコードでは、PWM 信号をその場で変更できます。シリアルモニターを
- Simple Control: すぐに使い始められますが、FPS を調整するにはファームウェアの再書き込みが必要です。
- Serial Control: 再書き込みなしでリアルタイムに周波数とデューティ比を調整できます(デバイスの電源が失われると設定はリセットされます)。
- Simple Control
- Serial Commands
#include <PWM.h>

// Pin configuration
int pin = 9;       // Pin
int value = 127;   // Initial value for the PWM duty cycle

// SET FREQUENCY HERE
float frequency = 60; // Initial frequency in Hz

void setup()
{
    // Initialize all timers except for timer0 to save timekeeping tasks
    InitTimersSafe();

    // Set the initial PWM frequency and duty cycle
    if (SetPinFrequencySafe(pin, frequency))
    {
        pwmWrite(pin, value);
        Serial.println("PWM frequency and initial duty cycle set.");
    }
    else
    {
        Serial.println("Failed to set frequency.");
    }
}
#include <PWM.h>

// Pin configuration
int pin = 9;          // Pin
int value = 127;      // Initial value for the PWM duty cycle
float frequency = 60; // Initial frequency in Hz

void setup()
{
    Serial.begin(9600);

    // Initialize all timers except for timer0 to save timekeeping tasks
    InitTimersSafe();

    // Set the initial PWM frequency and duty cycle
    if (SetPinFrequencySafe(pin, frequency))
    {
        pwmWrite(pin, value);
        Serial.println("PWM frequency and initial duty cycle set.");
    }
    else
    {
        Serial.println("Failed to set frequency.");
    }
}

void loop()
{
    if (Serial.available())
    {
        // Read frequency and duty cycle values over Serial
        String inputString = Serial.readStringUntil('\n');
        inputString.trim();
        int freqDutySplitIndex = inputString.indexOf(',');

        if (freqDutySplitIndex != -1)
        {
            String freqStr = inputString.substring(0, freqDutySplitIndex);
            String dutyStr = inputString.substring(freqDutySplitIndex + 1);

            // Parse floats
            float newFrequency = freqStr.toFloat();
            int newDutyCycle = dutyStr.toInt();

            // Validate frequency range
            if (newFrequency >= 1 && newFrequency <= 2000000)
            {
                // Set the PWM frequency and apply duty cycle
                if (SetPinFrequencySafe(pin, newFrequency))
                {
                    value = map(constrain(newDutyCycle, 0, 100), 0, 100, 0, 255);
                    pwmWrite(pin, value);
                    Serial.print("Set frequency to: ");
                    Serial.print(newFrequency);
                    Serial.print(" Hz, duty cycle to: ");
                    Serial.print(newDutyCycle);
                    Serial.println("%");
                }
                else
                {
                    Serial.println("Failed to set new frequency.");
                }
            }
            else
            {
                Serial.println("Invalid frequency value.");
            }
        }
        else
        {
            Serial.println("Invalid input format. Use frequency,dutycycle (e.g., 60,50).");
        }
    }
}
9600 ボーで開き、{FREQUENCY},{DUTY_CYCLE} 形式でコマンドを送信します(例: 60,50 で 60Hz、デューティ比 50%)。ソフトウェア
同期ビデオ Python ライブラリ
カスタム Linux Python ライブラリのインストールと使用方法については、当社の GitHub ガイドに従ってください。これは将来的にフル機能の SDK に置き換えられる可能性があります。
dweOS での同期ストリーミング
dweOS を使用して、2 台の同期された stellarHD カメラをネットワーク経由でストリーミングします。