The SVC Pro (containing an NVIDIA Jetson) includes our dweOS software alongside RTPSender which handles the internalized compute. The SVC Pro is designed as an integral part of our explore3D hardware ecosystem to provide high resolution stereo depth maps and real-time mapping, which are configured and viewed in DeepWater Desktop.
dweOS on the SVC Pro is intended only to bridge the gap for missing features in DeepWater Desktop. Camera, sensor, and depth-streaming configuration all happen in DeepWater Desktop.On versions prior to 1.2.0, dweOS is used for sensor controls.
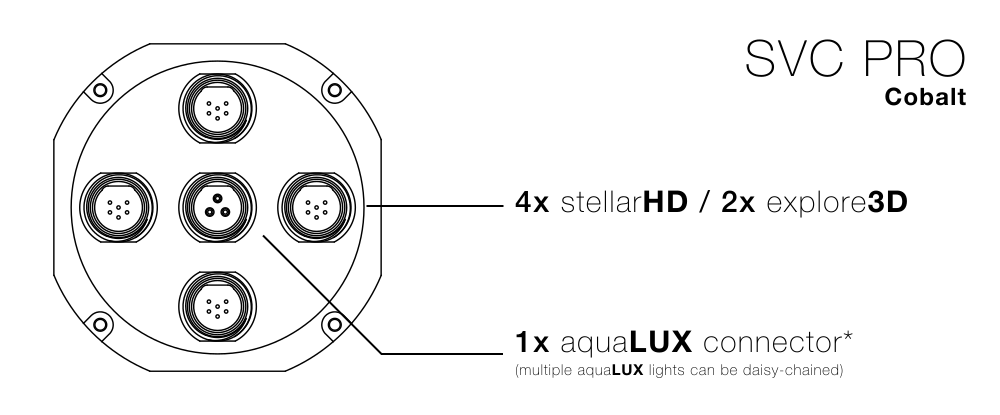
Each camera in the pair has its own cable. Connect each one to a separate camera port on the SVC Pro.Select your connector variant to find the camera ports.
Cobalt
SubConn MCBH8M
Side 1 — Camera and Light Connectors
Side 1 — Camera and Light Connectors
For the full connector reference, see the SVC Pro I/O connectors.Complete Kit: daisy chain your two aquaLUX MAX lights together, then run the single remaining light cable to a light port on Side 1. Ensure your right explore3D camera is plugged into the connector marked with black ink.You’ll confirm the cameras are on separate USB buses in DeepWater Desktop. See Maximizing Image Quality for why this matters.
This process will be streamlined in future versions of the SVC Pro.
2
Connect the SVC Pro to power and ethernet
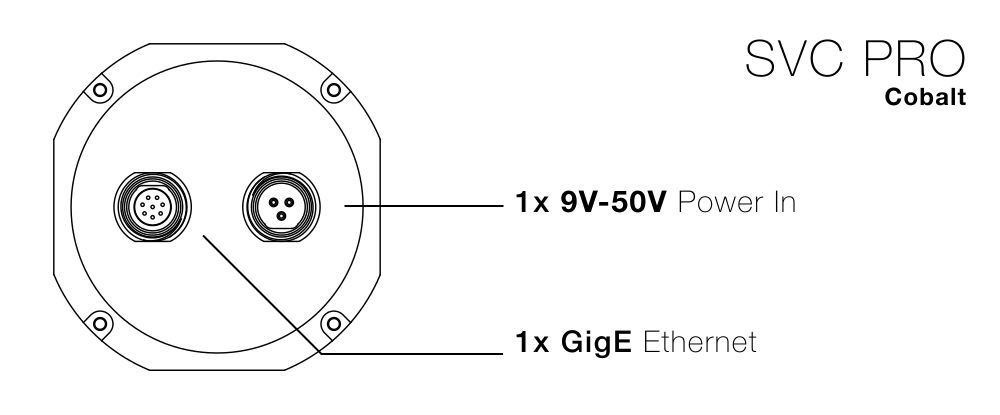
There are two connectors present on one side of the device:
Power Input (9-50V)
Ethernet Output
Cobalt
SubConn MCBH8M
Side 2 — Ethernet Output and Power Input
Side 2 — Ethernet Output and Power Input
Provide 9-50V on the side indicated in the image above.
Connect ethernet on the side indicated in the image above, following the pinout of your connector.Connect the other side of the ethernet to a personal computer.
Unlike the microSVC and SVC, the SVC Pro does not use PoE. Please do not attempt to connect a PoE connection to the SVC Pro module.
3
Configure your networking setup
In order to connect to the SVC Pro, you will need to set up your desktop computer to allow network communication with the device.Please use the following guide to set up your computer. Return back here to continue with setup.
Desktop Networking
Click here for a quickstart guide on how to configure your desktop networking setup.
4
Streaming Depth Map and Point Clouds
Move on to our guide for DeepWater Desktop, the companion desktop app for the SVC Pro.
Getting Started with DeepWater Desktop
Get started with stereo vision using DeepWater Desktop!
Assistant
Responses are generated using AI and may contain mistakes.