전기적 동기화와 소프트웨어 동기화가 모두 필요합니다. 자세한 지침은 아래를 참조하세요.
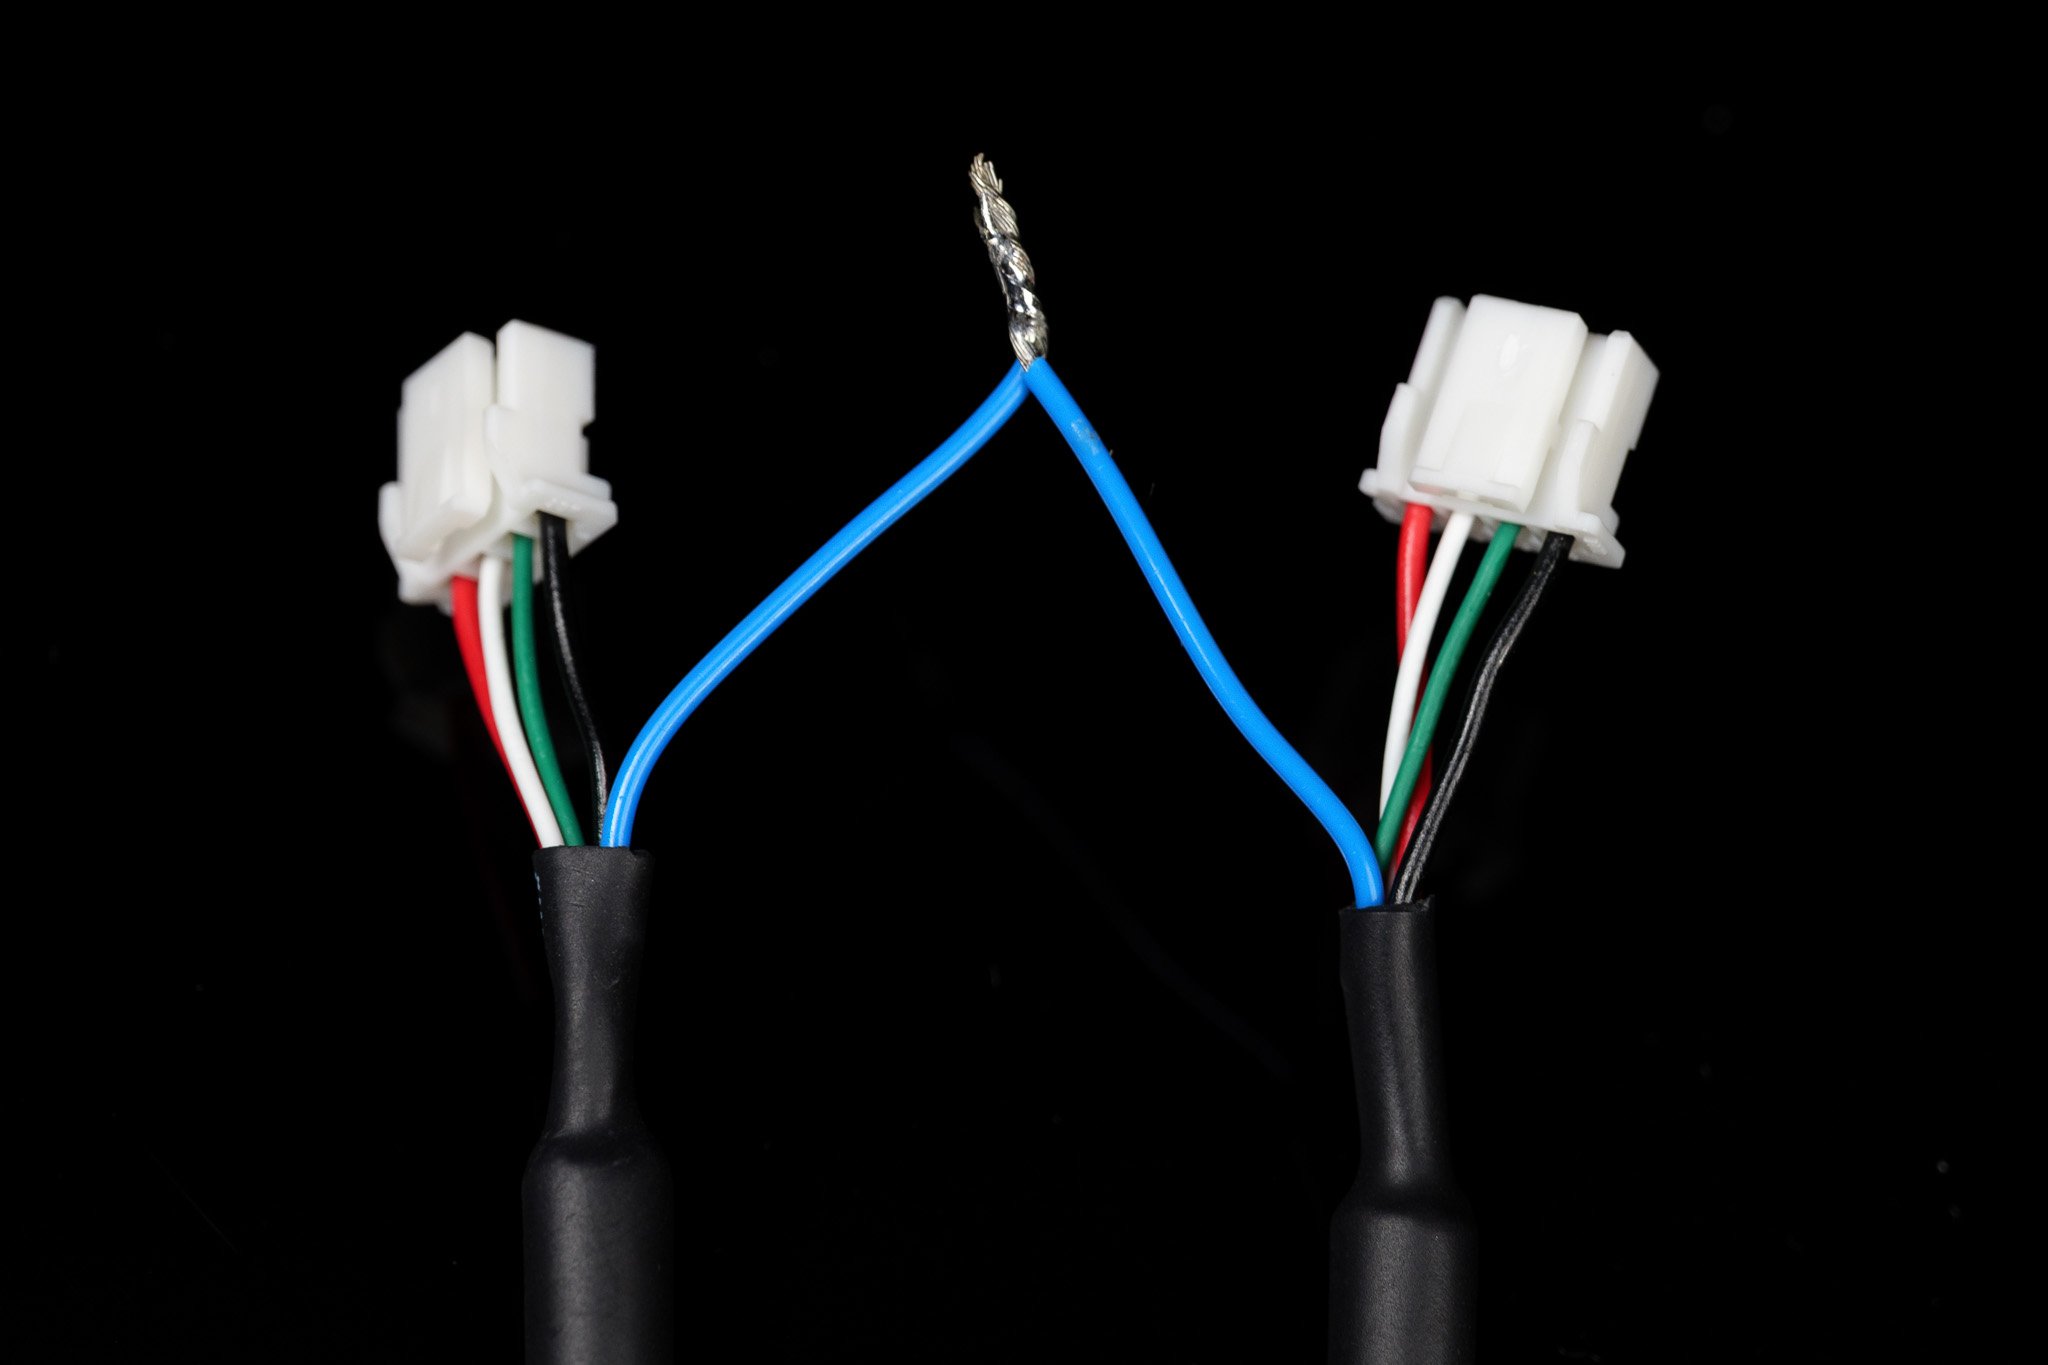
전기 배선 가이드
- Leader-Follower 모드
- Follower 전용 모드 (외부 클럭)


동기화된 비디오 Python 라이브러리 (Linux)
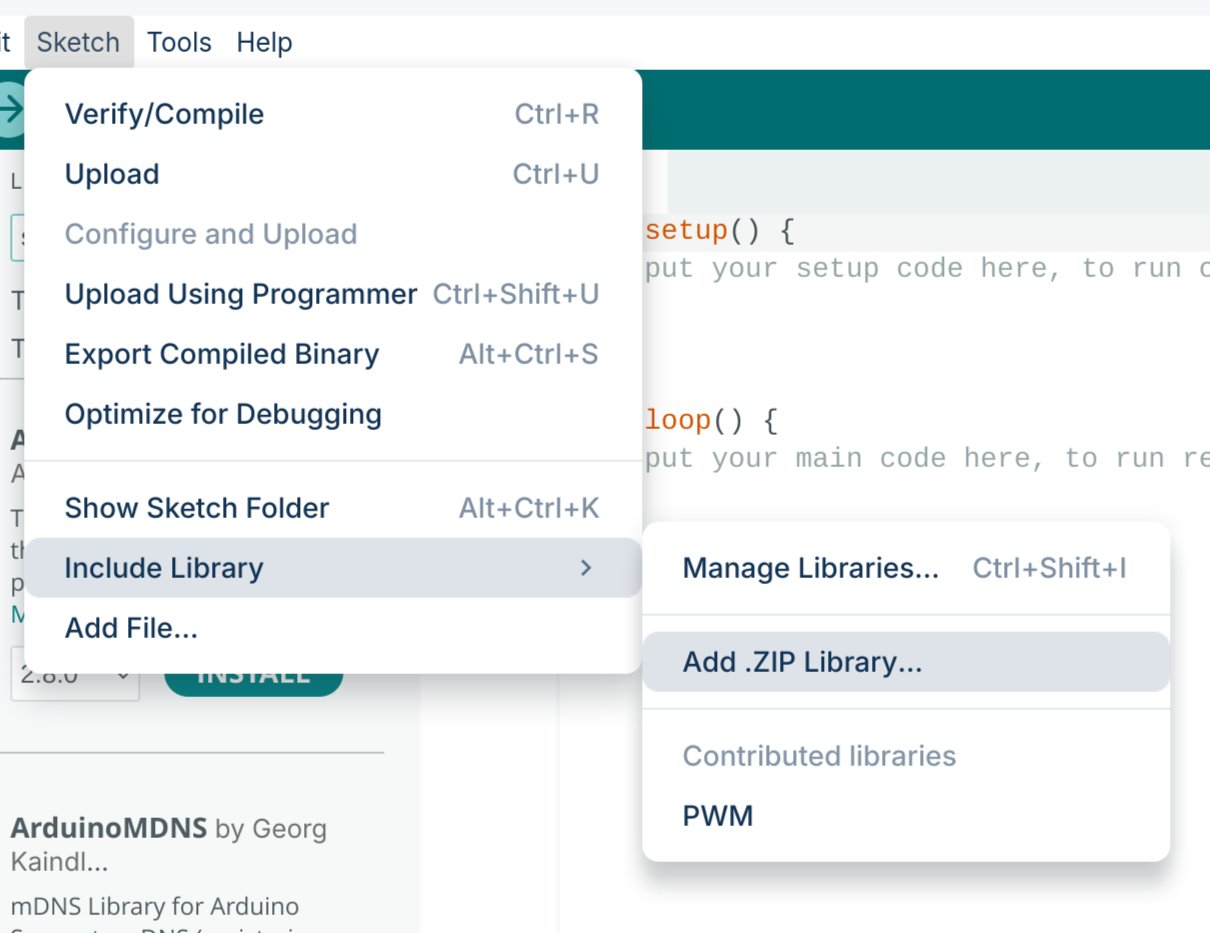
곧 출시될 SDK 외에도, 현재 카메라 설정에서 동기화된 프레임을 가져오는 간단한 Python 프로세스를 제공합니다. (참고: 향후 완전한 기능을 갖춘 SDK로 대체될 수 있습니다.)동기화된 비디오 Python 라이브러리
사용자 정의 Linux Python 라이브러리를 설치하고 사용하려면 GitHub 가이드를 따르세요.
동기화된 스티칭 비디오
GStreamer를 사용하여 두 비디오 피드를 동기화하고 스티칭한 다음, 다른 프로그램에서 사용할 가상 장치를 만드는 방법을 다룹니다.- Linux
1
필수 패키지 설치
다음 명령을 사용하여 필요한 종속성을 설치하세요:
2
현재 카메라 장치 목록 표시
다음 명령을 실행하여 연결된 카메라를 찾으세요:예시 출력:
3
가상 장치 생성
사용할 두 카메라의 장치 ID를 식별한 다음, 현재 나열되어 있지 않은 장치 ID 번호를 선택하세요.이 예시에서는 위에 사용되지 않은
9를 사용하여 stellarHD_stitched라는 가상 장치를 생성합니다. 선택한 사용되지 않는 ID에 맞게 아래 명령의 9를 업데이트하세요:4
GStreamer 파이프라인 실행
스티칭된 비디오를 생성하고 새 가상 장치로 스트림을 출력하는 파이프라인을 실행하세요:
동기화된 스티칭 비디오를 사용하는 동안 이 명령을 계속 실행해야 합니다. 카메라를 더 추가하거나, 해상도/프레임 속도를 변경하거나, 레이아웃을 변경하도록 이 명령을 수정할 수 있습니다.
5
OpenCV에서 가상 장치 사용
OpenCV 시작 코드
OpenCV에서
/dev/video9를 사용하려면 샘플 코드를 따르세요.6
루프백 장치 제거
루프백 장치를 안전하게 제거하려면 컴퓨터를 다시 시작하거나 다음 명령 시퀀스를 실행하세요:1. 현재 루프백 장치를 사용 중인 프로그램을 식별:2. PID (프로세스 ID) 번호를 사용하여 프로세스 종료:3. 루프백 장치 제거: