Pass your cable through a bulkhead
For Epoxy or WetLink models, follow the cable pinout guide located on the specification page for your exploreHD model.Below is an example of passing the exposed wiring through an M10 WetLink bulkhead to be installed onto your vehicle endcap.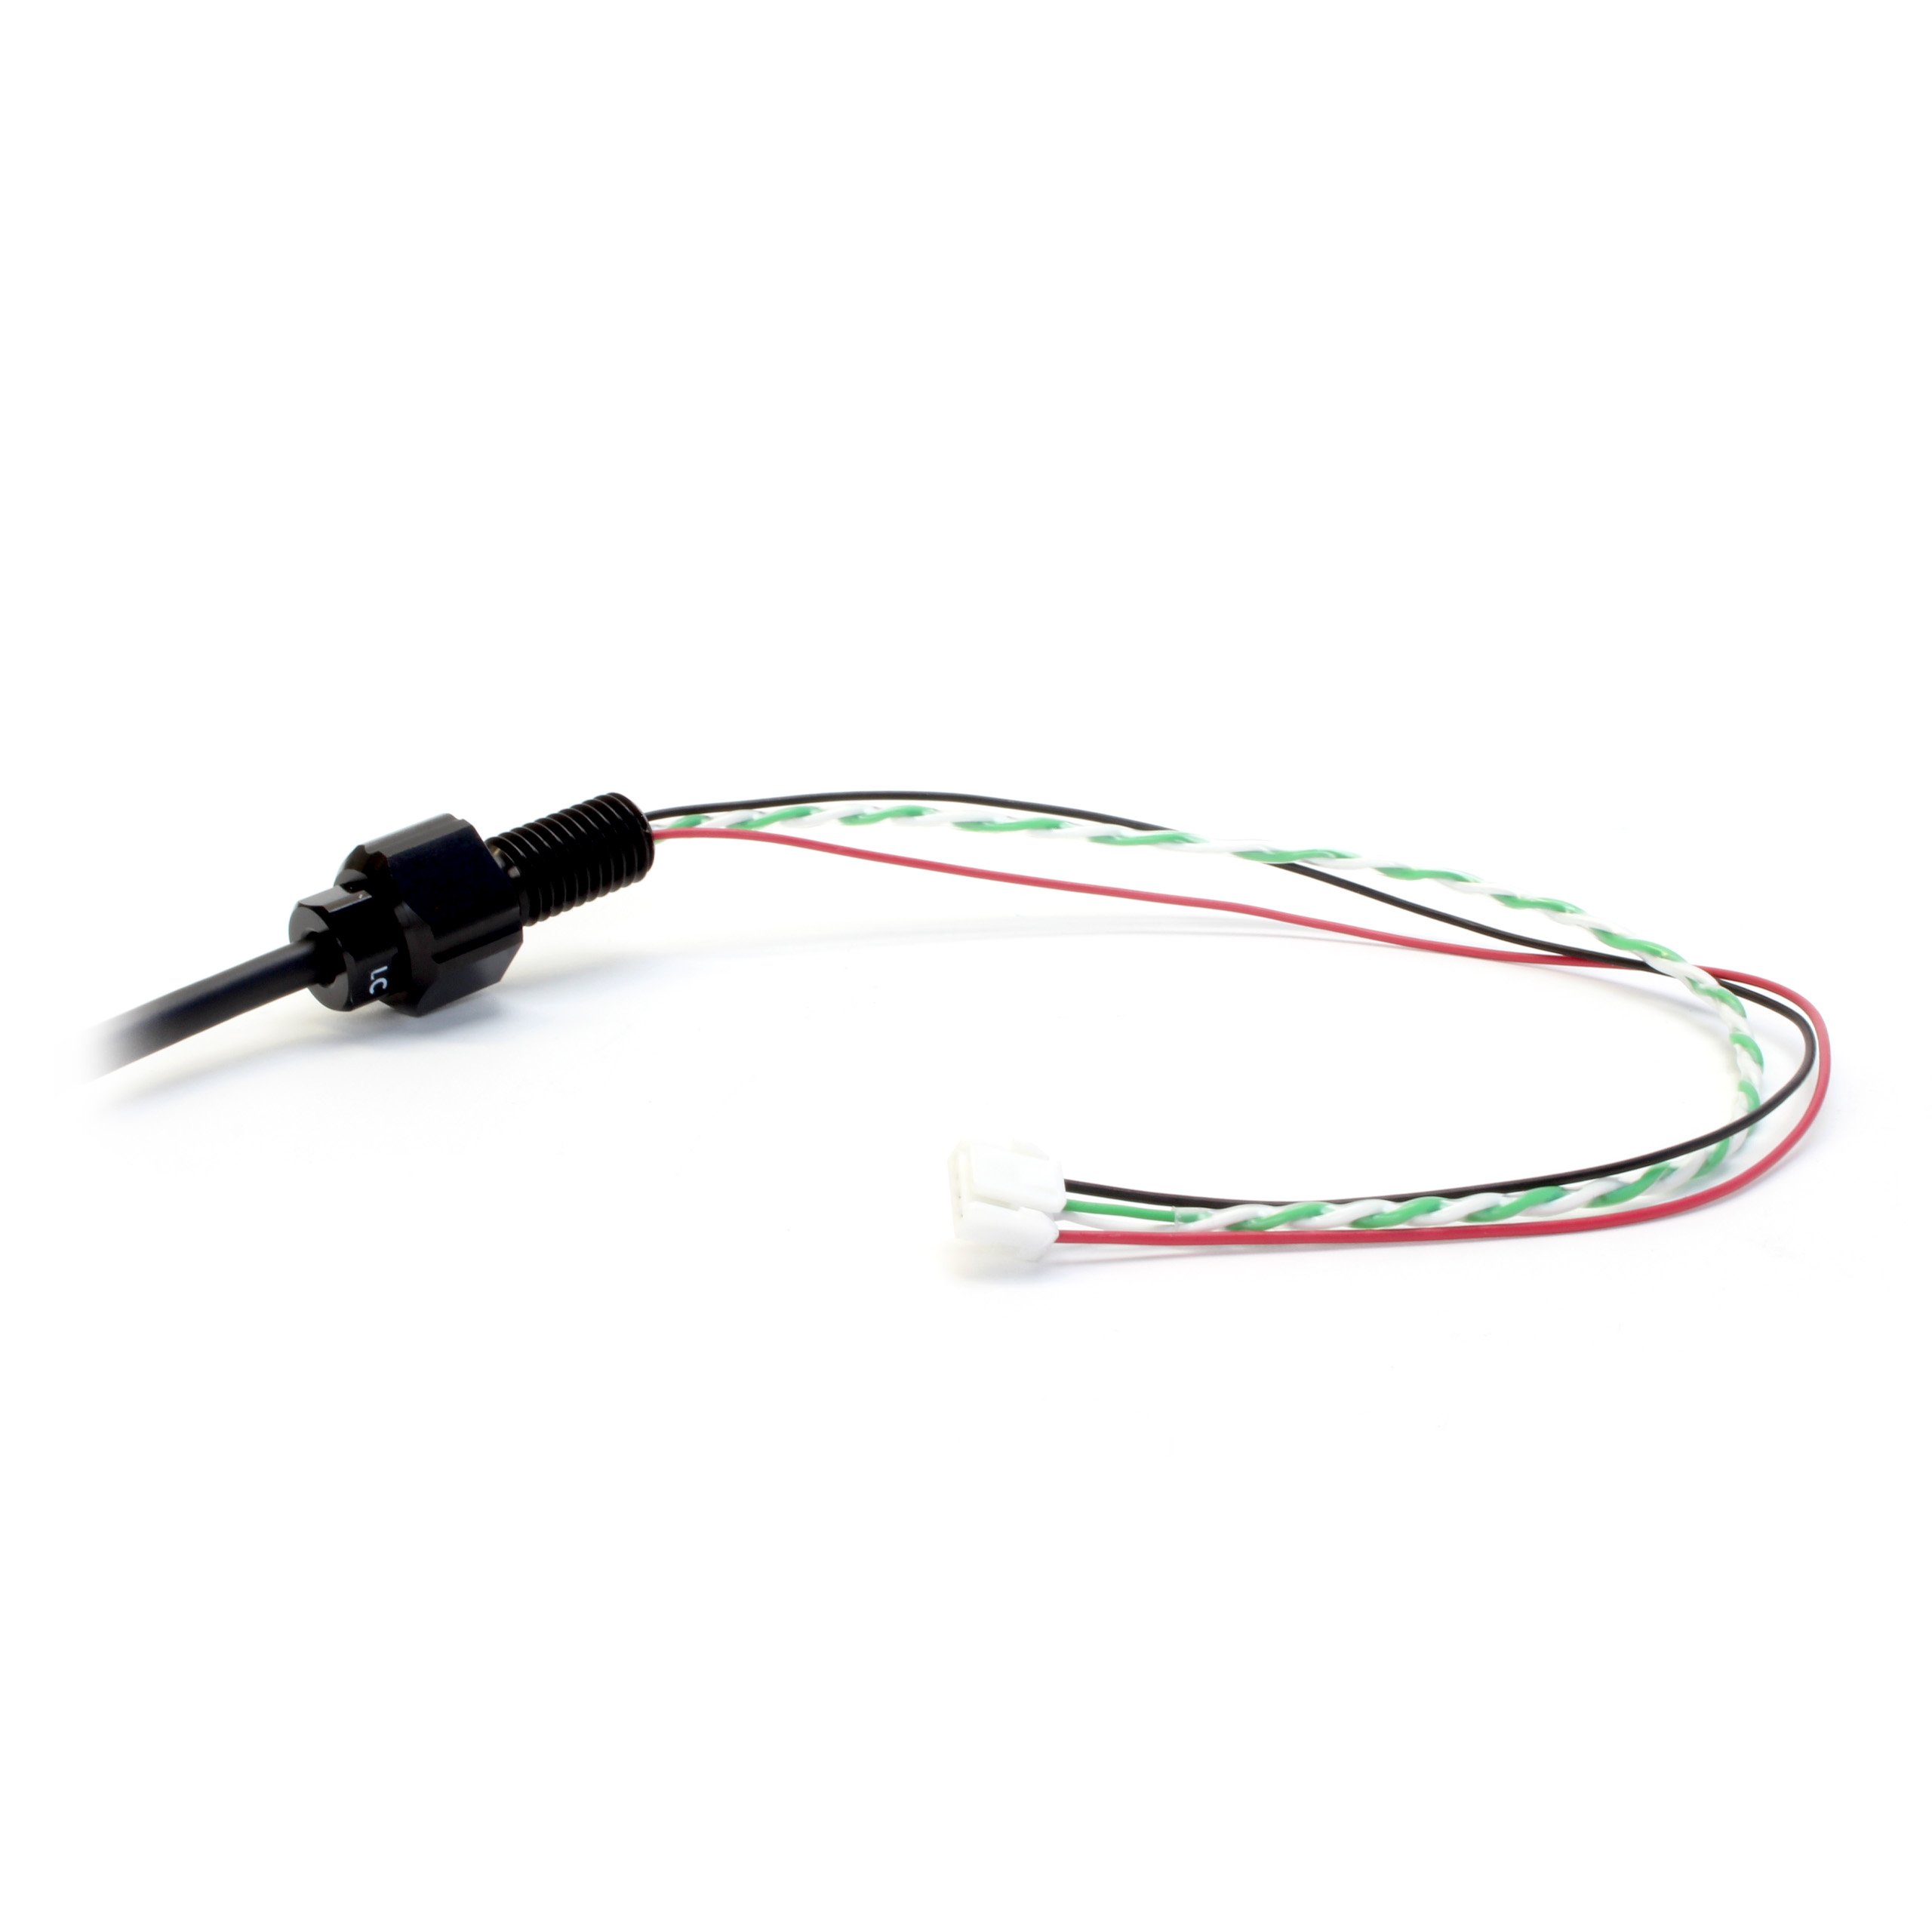
Vehicle-side WetLink Bulkhead
Preparing the JST Cable Connection
1
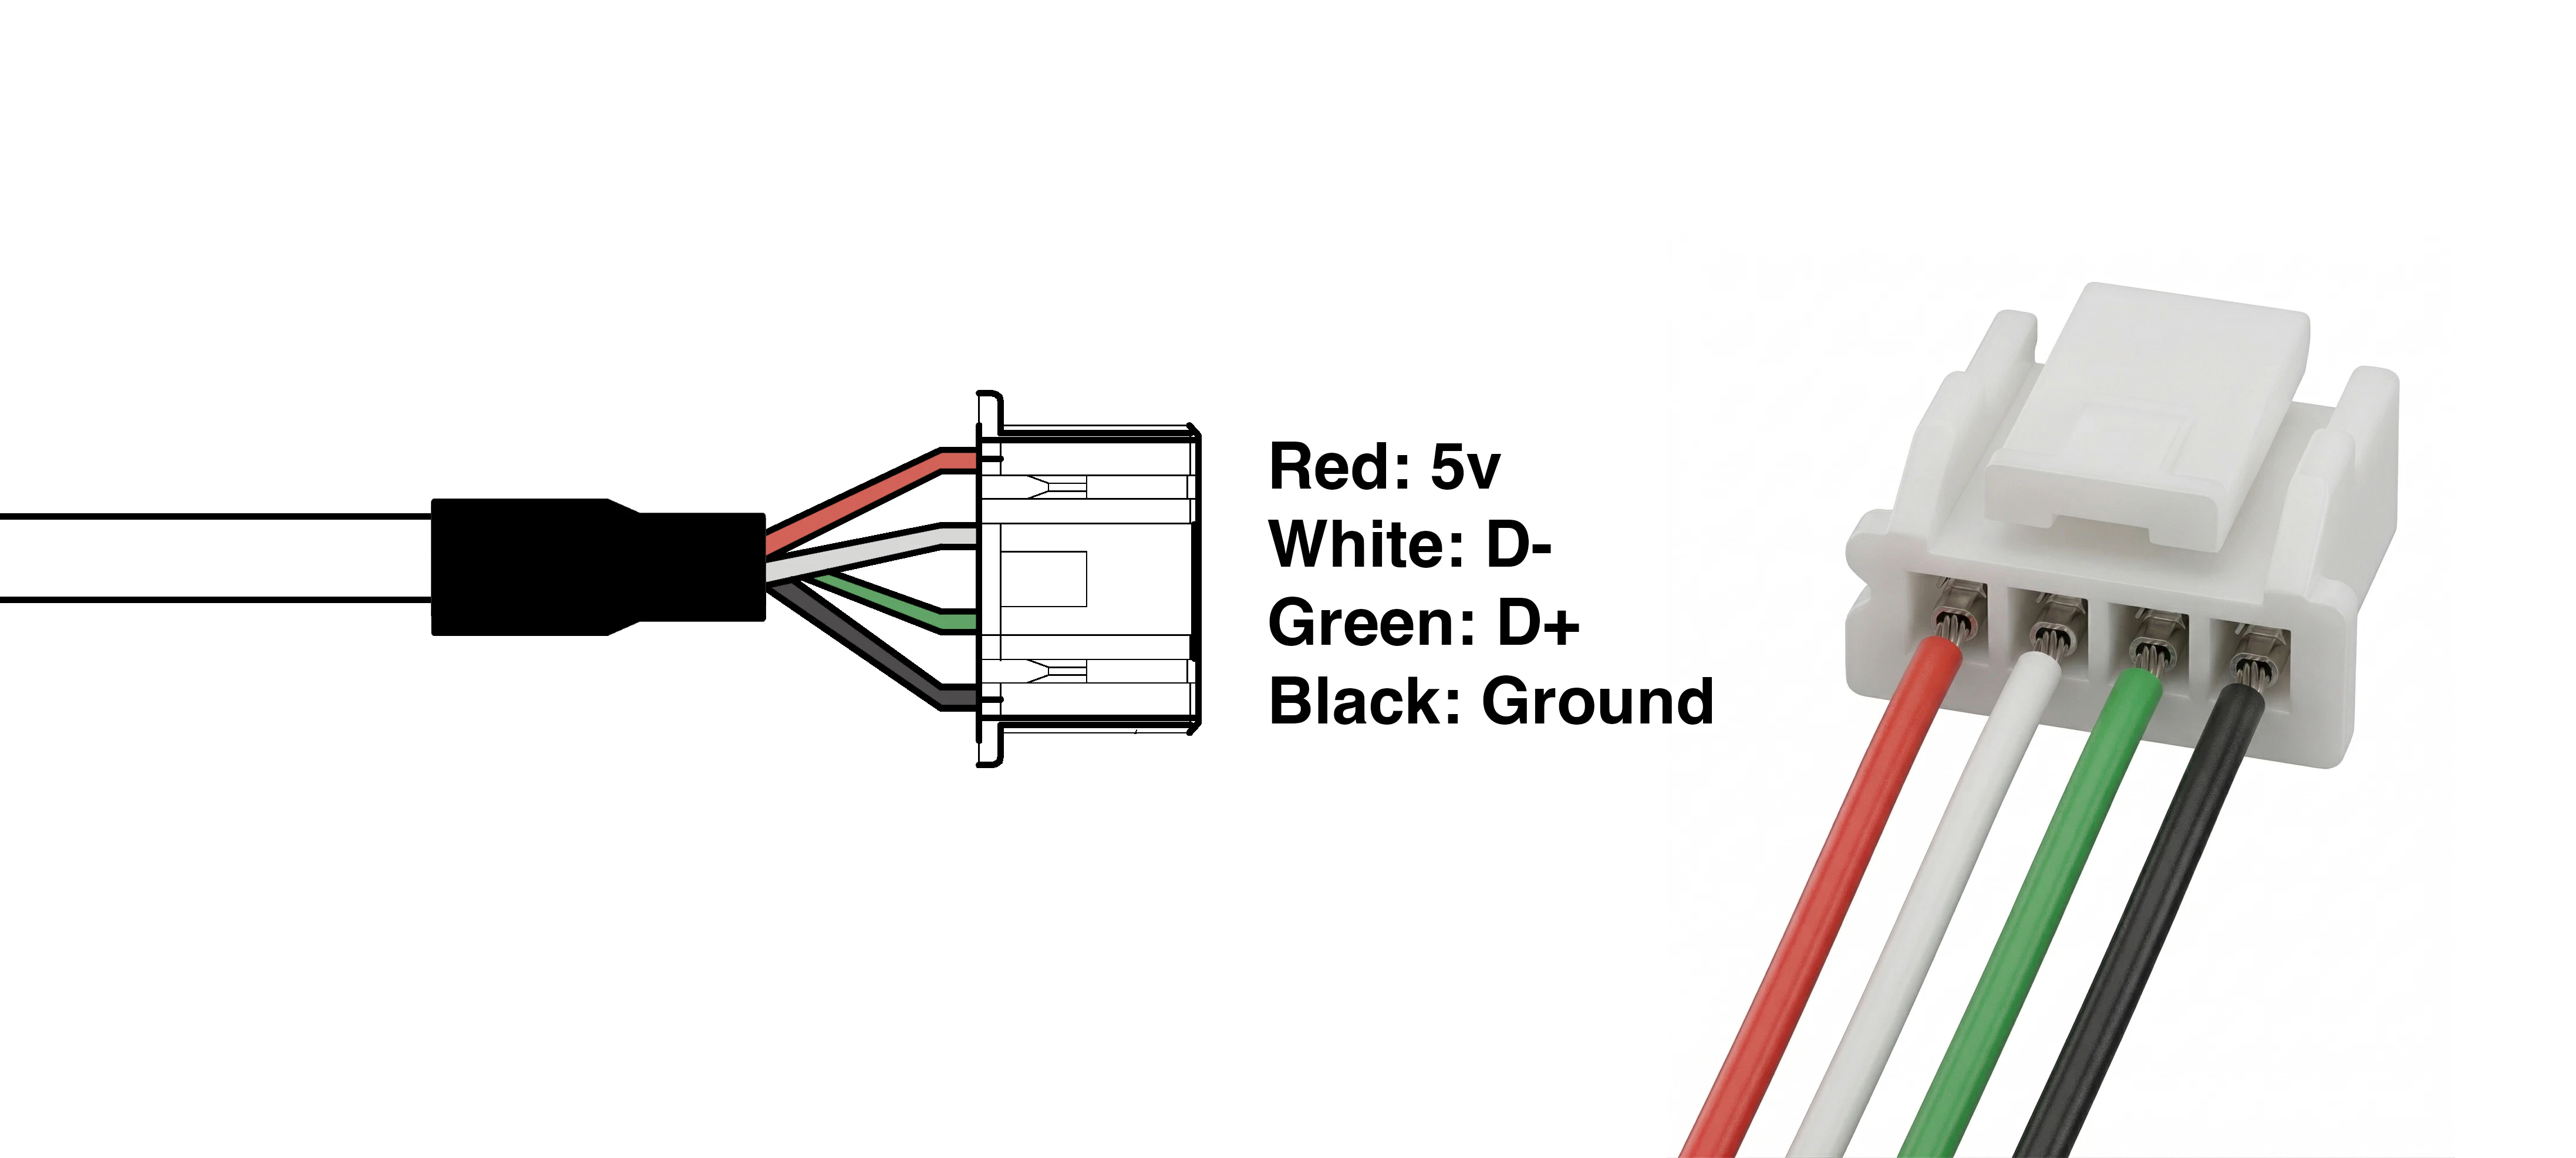
Review the wire functions before connecting
2
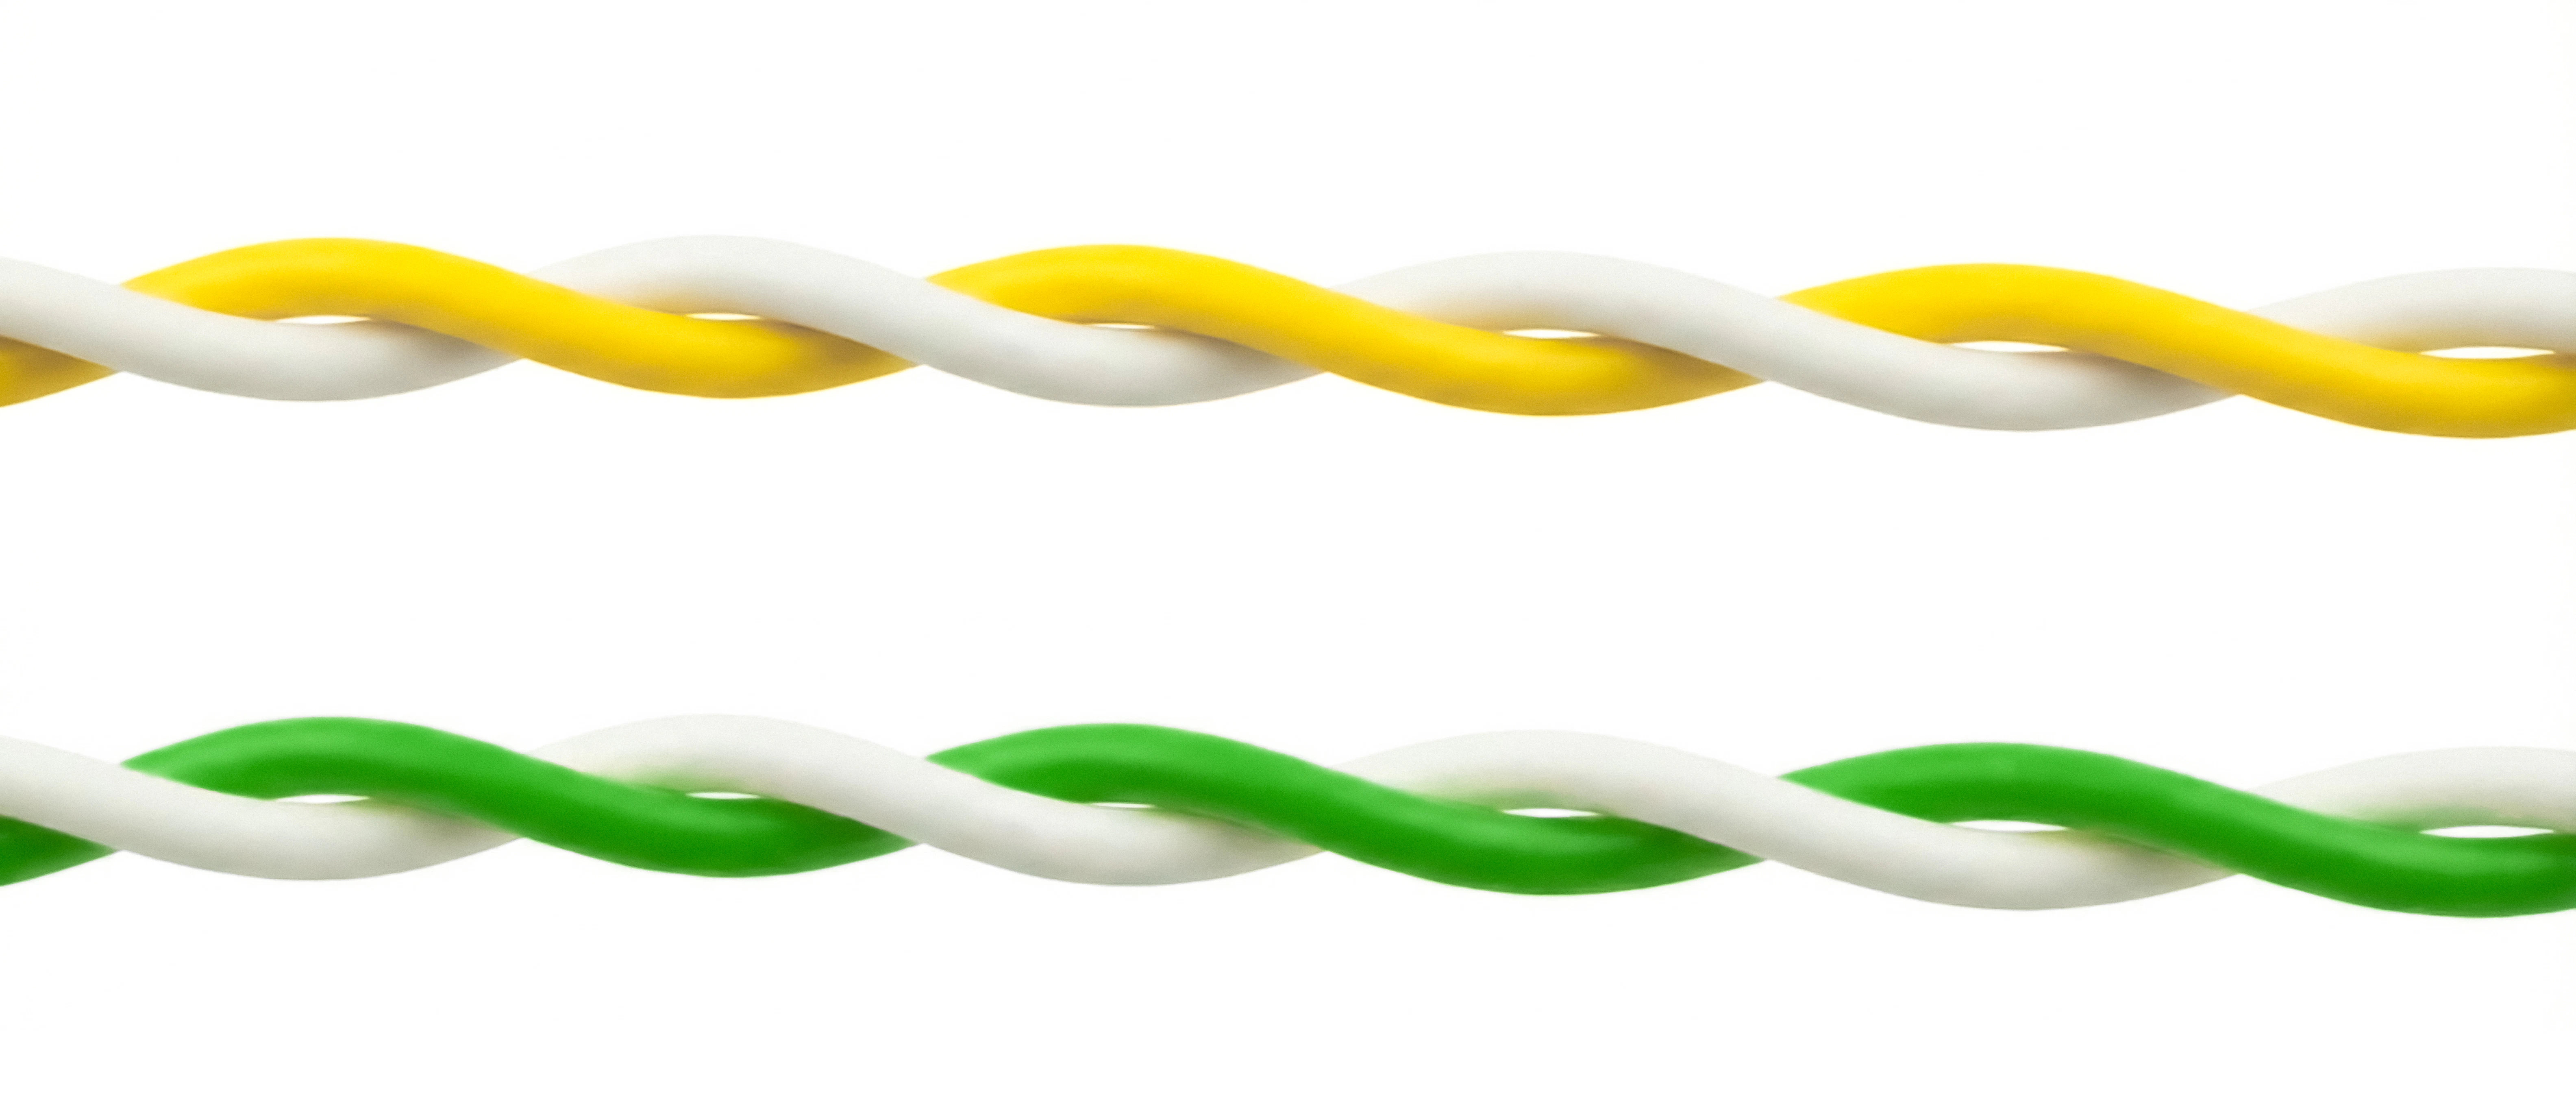
Ensure the following two wires are twisted/intertwined. Twisted pairs ensures the data signal is strong.
3
Connect the wires to the JST Connector
4
Connect the JST to the Adapter
5
Connect the Adapter to the USB Port on your computer
Test Your Camera Online
Connect the USB cable to a computer to confirm the camera is working and in the correct orientation. You can test the camera using our tool below.Online Camera Testing Utility
Convenient tool to test your USB camera feeds.
Other Resources
ROV Install Guide
Click here for a guide on how to install an exploreHD on a BlueROV.
Boat Install Guide
Click here for a guide on how to install an exploreHD on a BlueBoat.
OpenCV
Click here to see our resources for using the exploreHD with OpenCV.
Troubleshooting
Double-Check Your Wiring Setup
Ensure that the wire colors match their respective functions when connected to the JST connector. Even a single crossed wire will prevent the camera from being recognized.Ensure the Data Wires are Twisted (Crucial)
The White (D-) and Yellow/Green (D+) wires must be twisted/intertwined together. Because this is a USB 2.0 High-Speed connection, twisting these pairs is required in order to prevent interference and ensure the data signal is strong enough for your computer to recognize the camera.Check Connections and Power
Make sure the wires are seated securely in the JST connector. Make sure the JST is pushed all the way into the USB adapter, and the adapter is securely plugged into your USB port. The camera can draw up to 260mA of power (at 5V). Try plugging the adapter directly into your computer, rather than a low-power USB hub, to ensure it is getting sufficient current.OS Hardware Detection
Check if your computer’s operating system is detecting the camera at a hardware level, even if it’s not showing an image yet. Since it connects via USB, we are looking for a USB device connection.- Windows
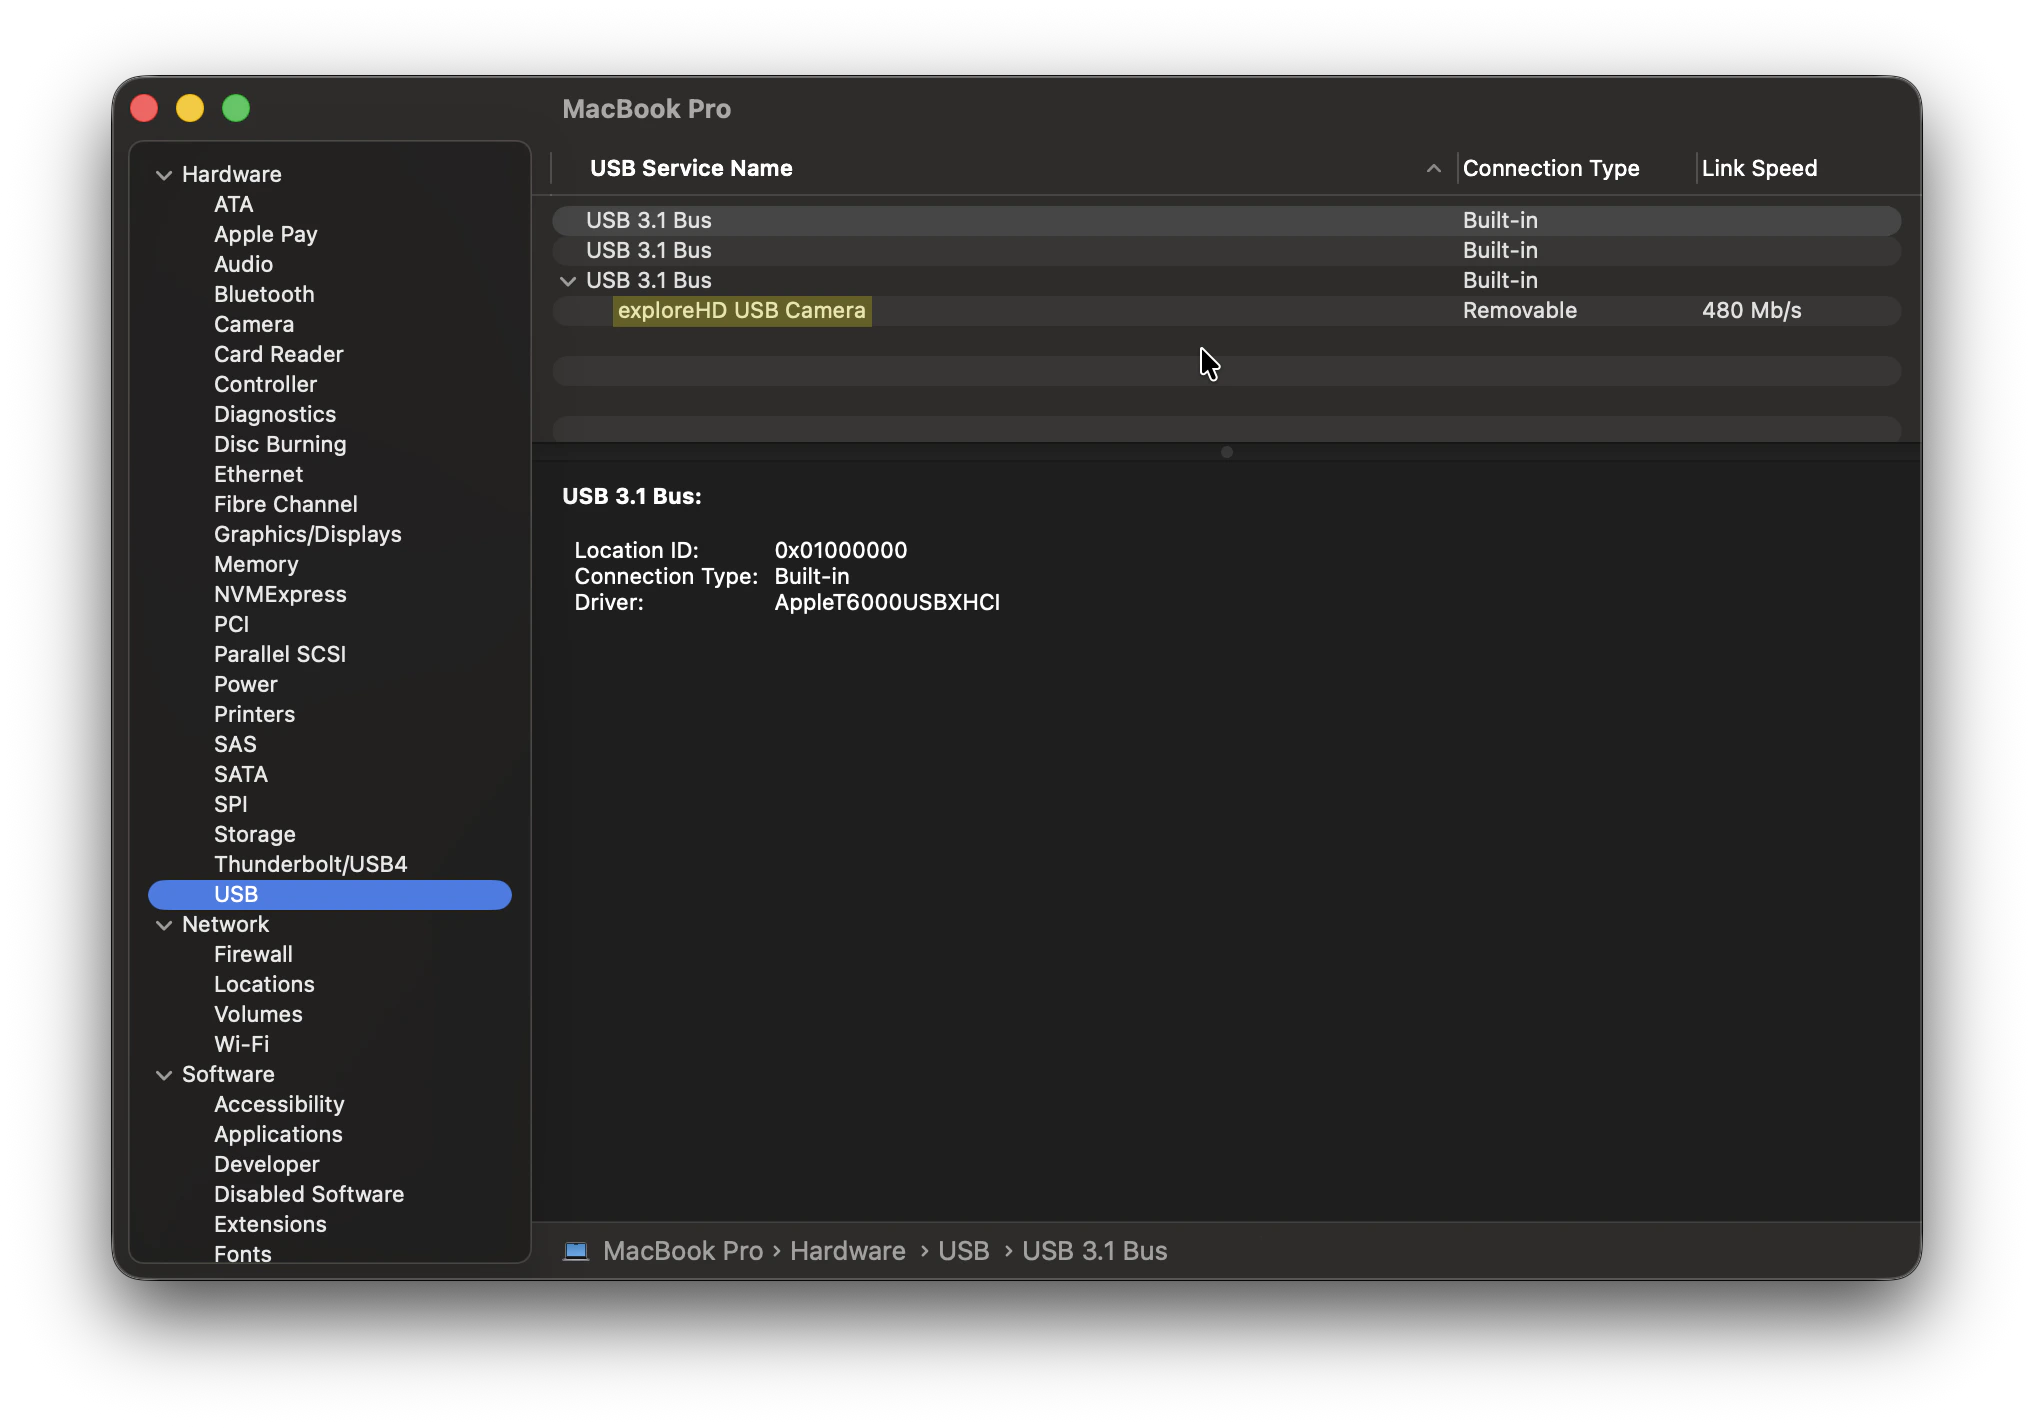
- macOS
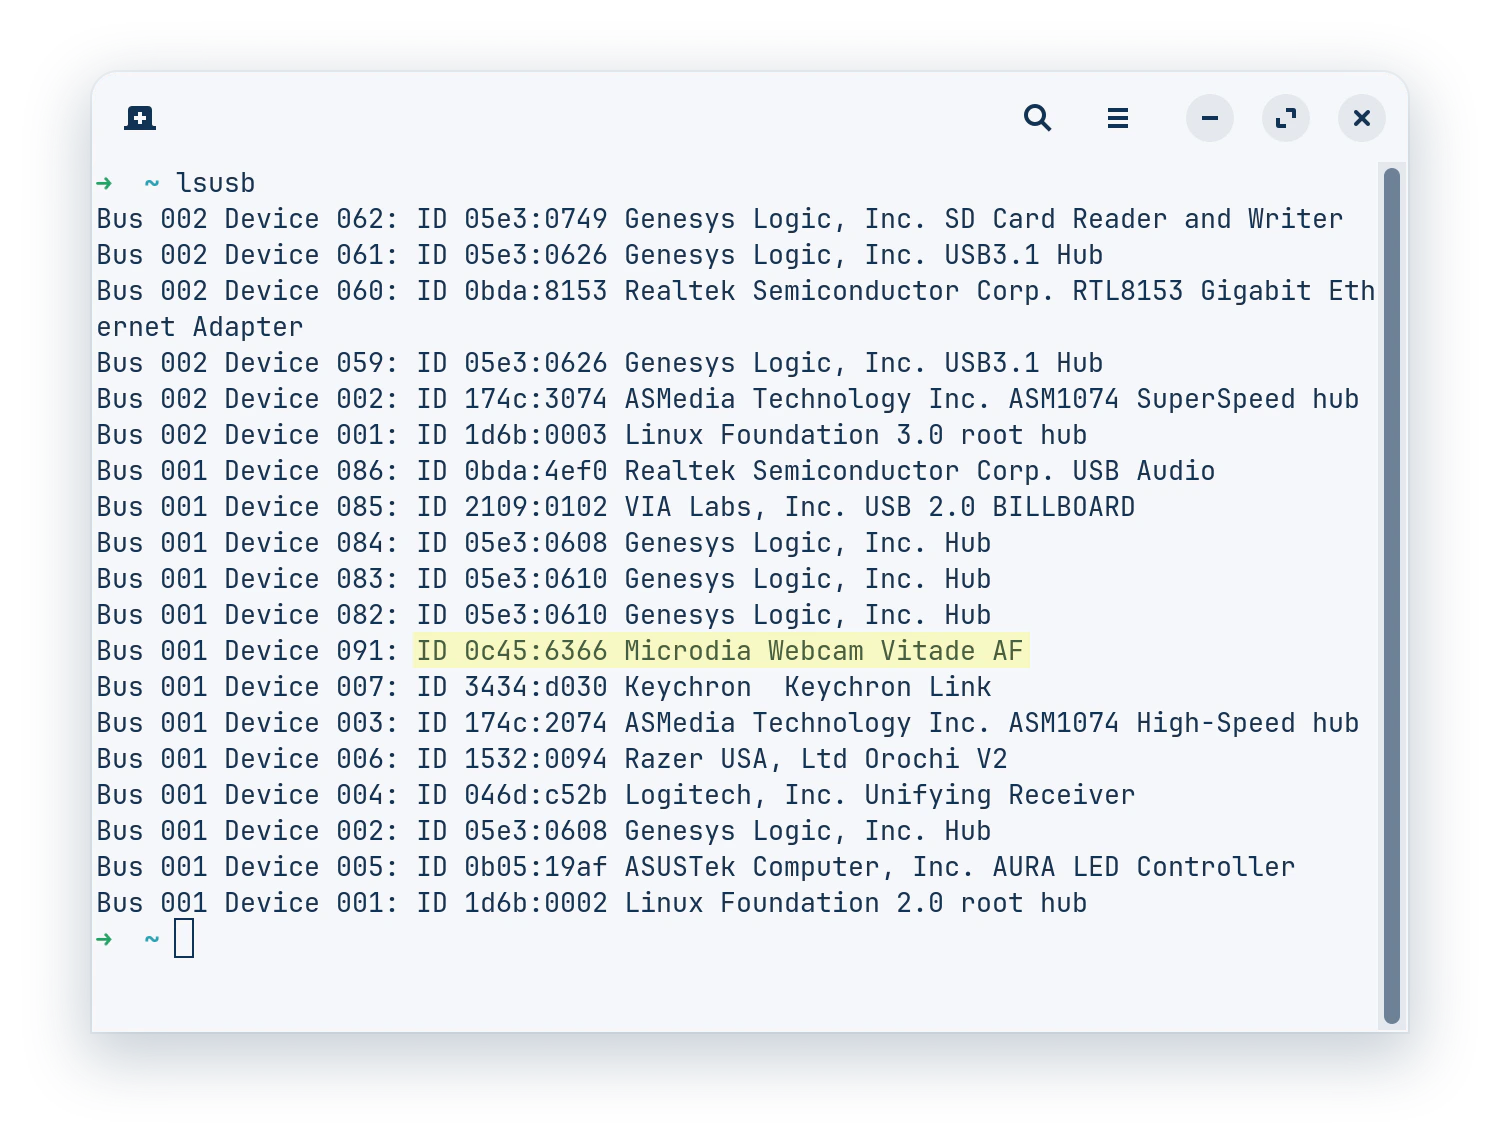
- Linux
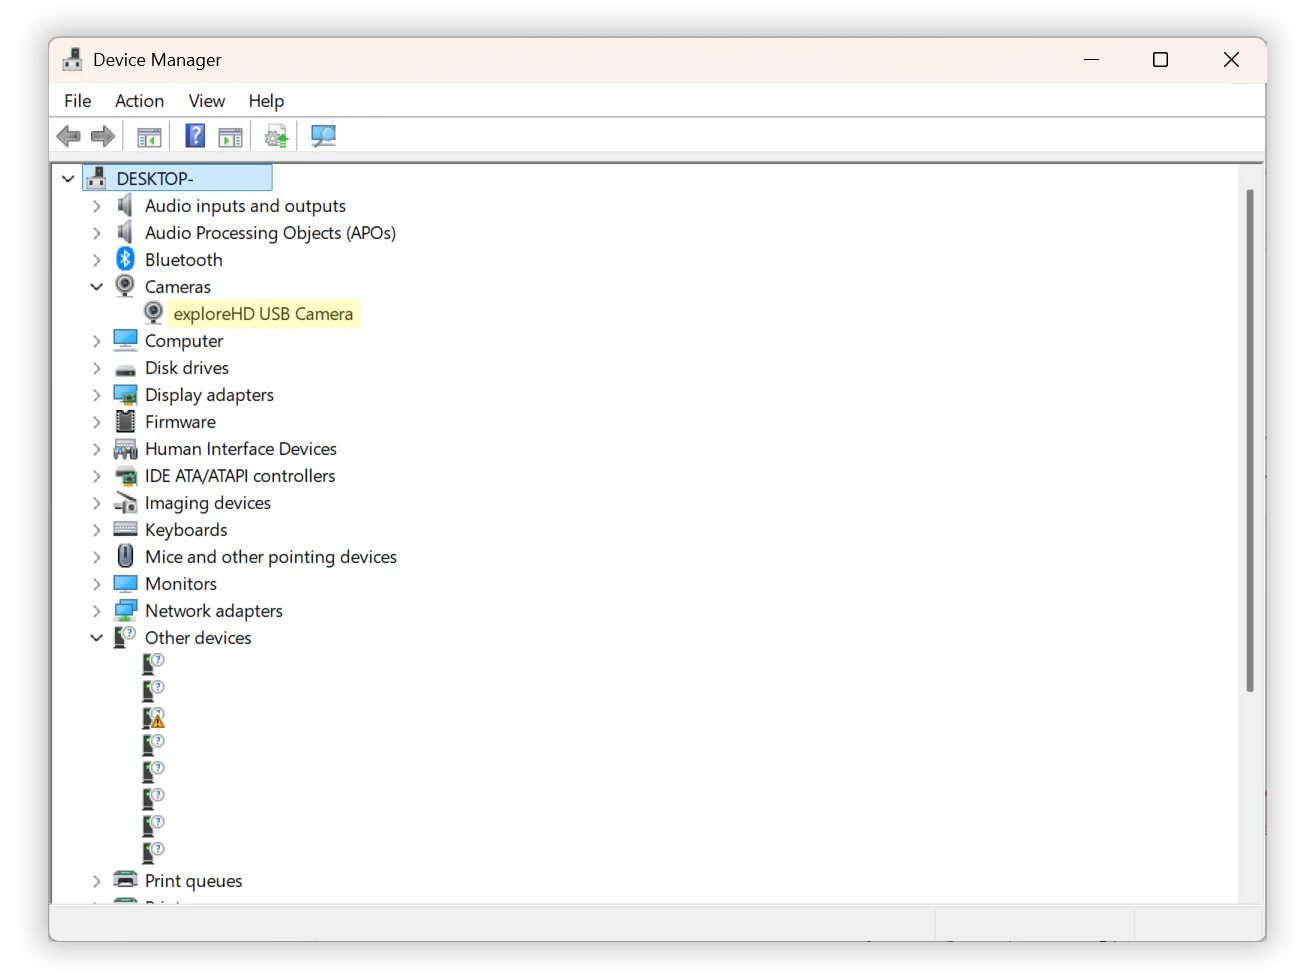
- Right-click the Start button (or press
Win+X) and select Device Manager. - Expand the following categories to look for the camera,
exploreHD:- Cameras
- Imaging devices
- Sound, video and game controllers
- If the wiring is slightly off or the data lines aren’t twisted properly, Windows might detect something but not know what it is. Expand Universal Serial Bus controllers and look for anything labeled Unknown USB Device (Device Descriptor Request Failed).