> ## Documentation Index
> Fetch the complete documentation index at: https://docs.dwe.ai/llms.txt
> Use this file to discover all available pages before exploring further.
# 데스크톱 네트워크 설정 가이드
> 이 가이드는 차량/시스템과 노트북/PC 또는 기타 데스크톱 컴퓨터를 직접 연결하여 설정하는 방법을 도와드립니다.
차량/시스템을 노트북/PC의 이더넷 포트에 직접 연결하고 있는지 확인하세요.
## 장치 이더넷 구성
이 단계는 Raspberry Pi가 이더넷을 통해 제공하는 로컬 네트워크에서 장치의 IP를 설정하기 위해 필요합니다.
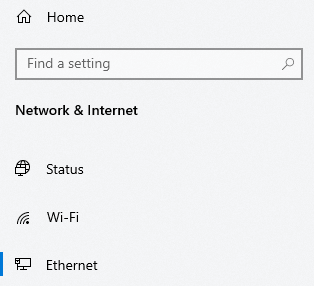
**설정/네트워크 및 인터넷**에서 **이더넷**을 선택합니다.
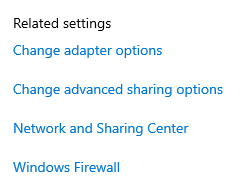
오른쪽의 **관련 설정**에서 `어댑터 옵션 변경`을 선택합니다.
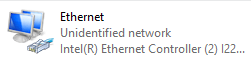
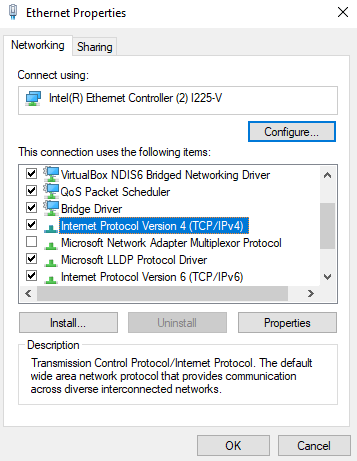
`식별되지 않은 네트워크` 부제목이 붙은 `Ethernet`이라는 어댑터를 찾습니다.
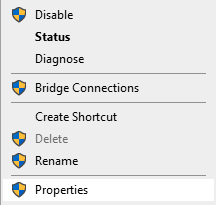
어댑터를 마우스 오른쪽 버튼으로 클릭하고 `속성`을 선택합니다.
`인터넷 프로토콜 버전 4(TCP/IPv4)`를 찾아 `속성`을 선택합니다.
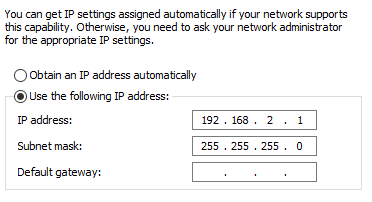
다음과 같이 메뉴를 편집합니다:
`확인`을 클릭하여 변경 사항을 적용합니다. 이제 Pi가 올바른 IP 주소로 Windows 장치를 식별하여 데이터를 스트리밍할 수 있게 됩니다.
이 지침은 `Ubuntu 22.04`용이지만, 대부분의 Linux 배포판에 일반화하여 적용할 수 있습니다.
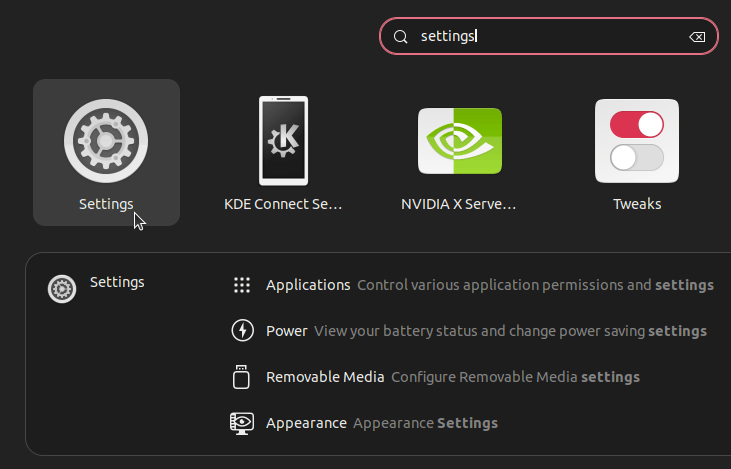
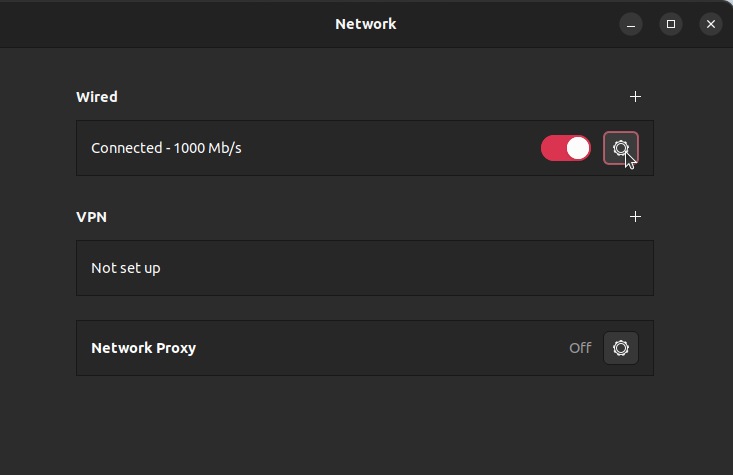
**Settings**를 검색합니다.
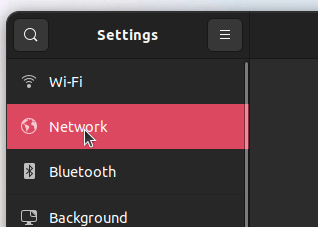
**Network**를 선택합니다.
**Wired** 아래에서 설정/톱니바퀴 아이콘을 선택합니다.
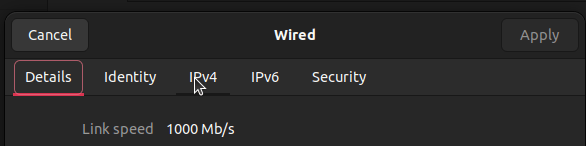
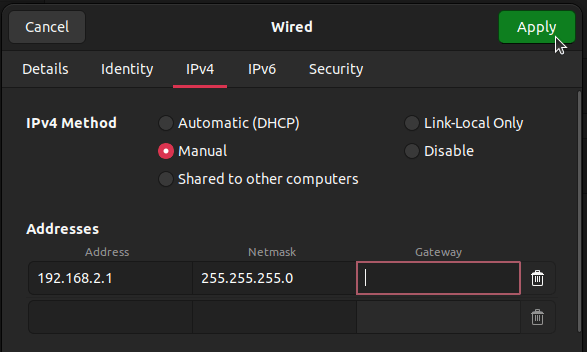
상단의 **IPv4** 탭을 선택합니다.
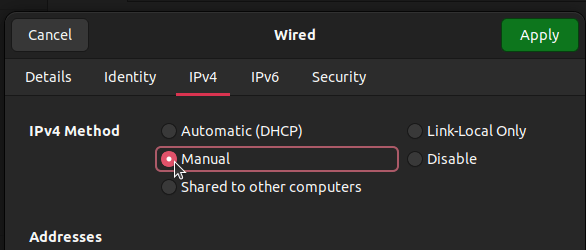
**IPv4 Method**에서 **Manual**을 선택합니다.
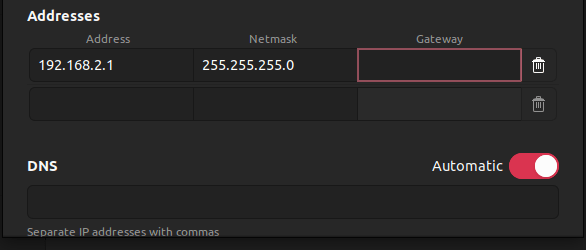
**Addresses** 아래에서 다음과 같이 설정을 변경합니다:
**Apply**를 클릭합니다. 이제 Pi가 올바른 IP 주소로 Linux 장치를 식별할 수 있게 됩니다.
window.history.back()} onMouseEnter={(e) => e.currentTarget.firstChild.style.borderColor = '#46bae7'} onMouseLeave={(e) => e.currentTarget.firstChild.style.borderColor = ''} style={{ cursor: 'pointer', display: 'contents' }}>
이 버튼을 클릭하면 이전에 보고 있던 페이지로 돌아갑니다!