> ## Documentation Index
> Fetch the complete documentation index at: https://docs.dwe.ai/llms.txt
> Use this file to discover all available pages before exploring further.
# dweOS to OBS Studio
> This guide is to help you setup streaming from dweOS to OBS Studio.
dweOS does not officially support streaming to OBS. The following steps are for Linux and Windows only.
After following the dweOS setup, continue to next steps.
Note down the port(s) being streamed to.
Click here to download OBS Studio for Desktop on your Laptop/PC.
Within the terminal, run:
```sh theme={null}
sudo apt install gstreamer1.0-plugins-base gstreamer1.0-plugins-good gstreamer1.0-plugins-ugly gstreamer1.0-libav gstreamer1.0-tools
```
Install the development headers as well for plugin use:
```sh theme={null}
sudo apt install libgstreamer1.0-dev libgstreamer-plugins-base1.0-dev
```
Click here to download GStreamer for Desktop on your Laptop/PC.
Make sure to download the MinGW version, and install both runtime and development.
When in doubt, install the 64-bit version, as this is more common.
GStreamer would automatically install in the D drive if you have more than one drive on your PC. You can change it to the C drive when you do custom installation.
If you install it on the D drive, just keep note of that when you set up your environment variables below.
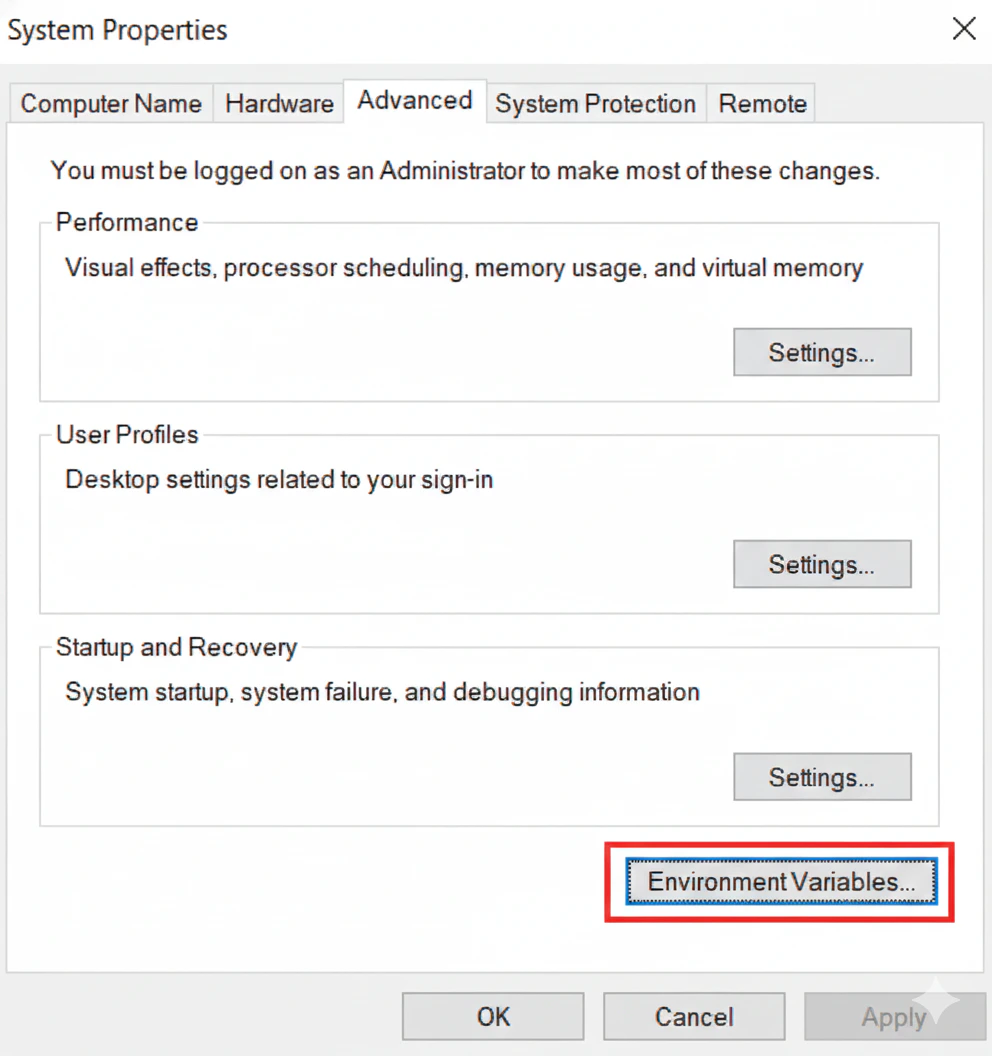
To get to Environment Variables, press `Win + R`
Type:
```
SystemPropertiesAdvanced
```
and press `Enter`
Click `Environment Variables...`
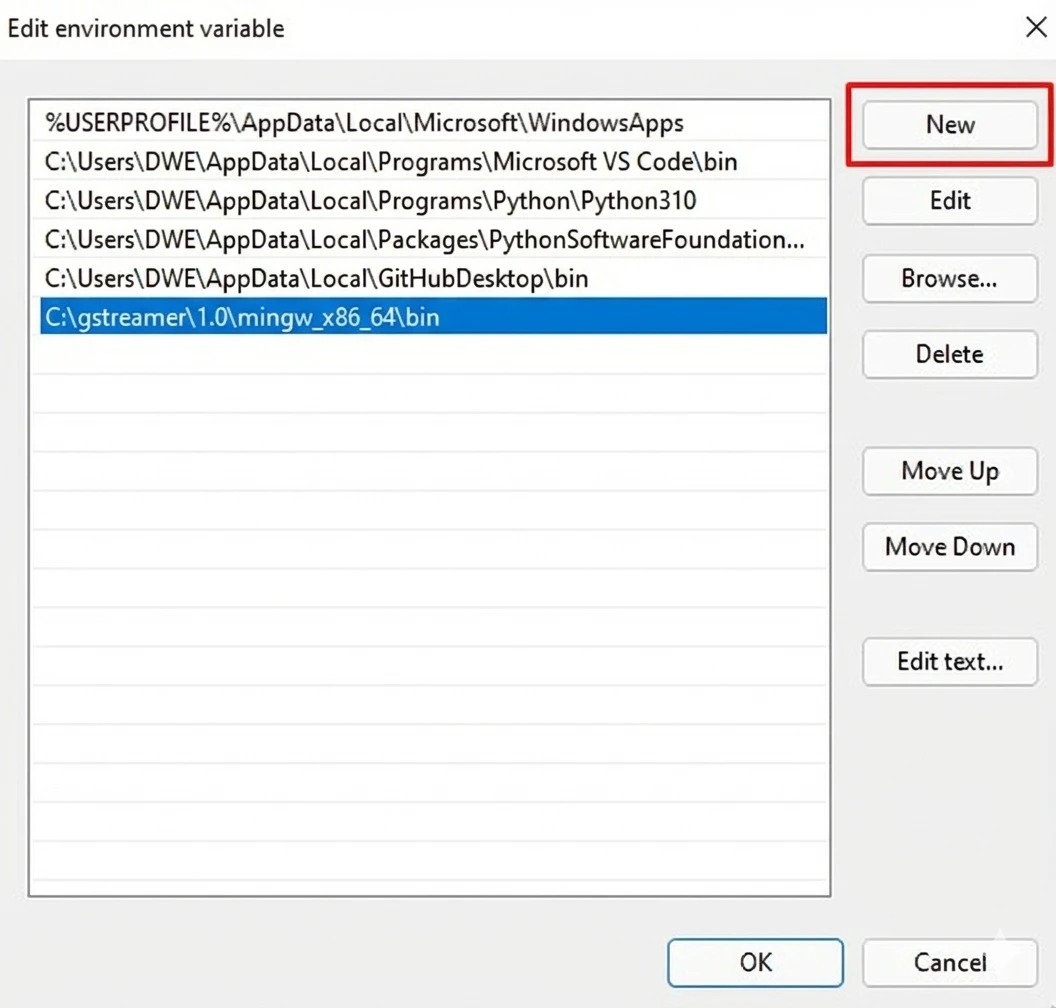
 Highlight the variable `Path` under `User variables` by clicking on it and then click `Edit…` under the `User variables` box.
 A new window should pop up and you want to click on `New` and add a path to your bin folder to the list. In this case, it’s:
```
C:\gstreamer\1.0\mingw_x86_64\bin
```
The path to your bin may vary and can be found from where you installed GStreamer in previous steps.
A new window should pop up and you want to click on `New` and add a path to your bin folder to the list. In this case, it’s:
```
C:\gstreamer\1.0\mingw_x86_64\bin
```
The path to your bin may vary and can be found from where you installed GStreamer in previous steps.
 After that, click `OK` on both windows and you should be ready to go!
You should now have GStreamer setup and ready for next steps!
To verify the GStreamer setup, open `CMD` and run the following:
```sh theme={null}
gst-launch-1.0 --version
```
This should result in an output like:
```sh theme={null}
gst-launch-1.0 version 1.16.2
GStreamer 1.16.2
https://launchpad.net/distros/ubuntu/+source/gstreamer1.0
```
Download the latest plugin build [here](https://github.com/fzwoch/obs-gstreamer/releases/).
From the `.zip` file extract and locate the `obs-gstreamer.so` file within the `linux` folder.
In another file explorer, locate the `obs-plugins` folder, or run this command in terminal to grab the path:
```sh theme={null}
sudo find /usr/lib -name "obs-plugins" -type d
```
This is likely to be similar to `/usr/lib/x86../obs-plugins`.
Move the `.so` file into the `obs-plugins` folder, or from the terminal, run:
```sh theme={null}
sudo mv ~/Downloads/linux/obs-gstreamer.so /usr/lib/x86_64-linux-gnu/obs-plugins/
```
In this case the location of my `obs-gstreamer.so` is `~/Downloads/linux/obs-gstreamer.so`, be sure to replace it with the path where you extracted the `obs-gstreamer.so` file.
Remember to replace the `/usr/lib/x86../obs-plugins` with your `obs-plugin` folder path as well.
Restart OBS Studio should you have it running.
Download the latest plugin build [here](https://github.com/fzwoch/obs-gstreamer/releases/).
From the `.zip` file extract and locate the `obs-gstreamer.dll` file within the `windows` folder.
In another file explorer, locate the `obs-plugins\64-bit` folder (or whichever bit size you installed)
This is likely to be similar to `C:\Program Files\obs-studio\obs-plugins\64bit`.
If you can't find it, right-click your OBS Studio shortcut on the desktop or Start Menu, select `Open file location`, and navigate up one level to the main `obs-studio` folder, where you'll find the `obs-plugins` folder.
Move the `.dll` file into the `obs-plugins\64-bit` folder.
Windows will likely ask for Administrator permission to move files into C:\Program Files. Click `Continue` or `Yes`.
Restart OBS Studio should you have it running.
The process from here is pretty much identical across operating systems.
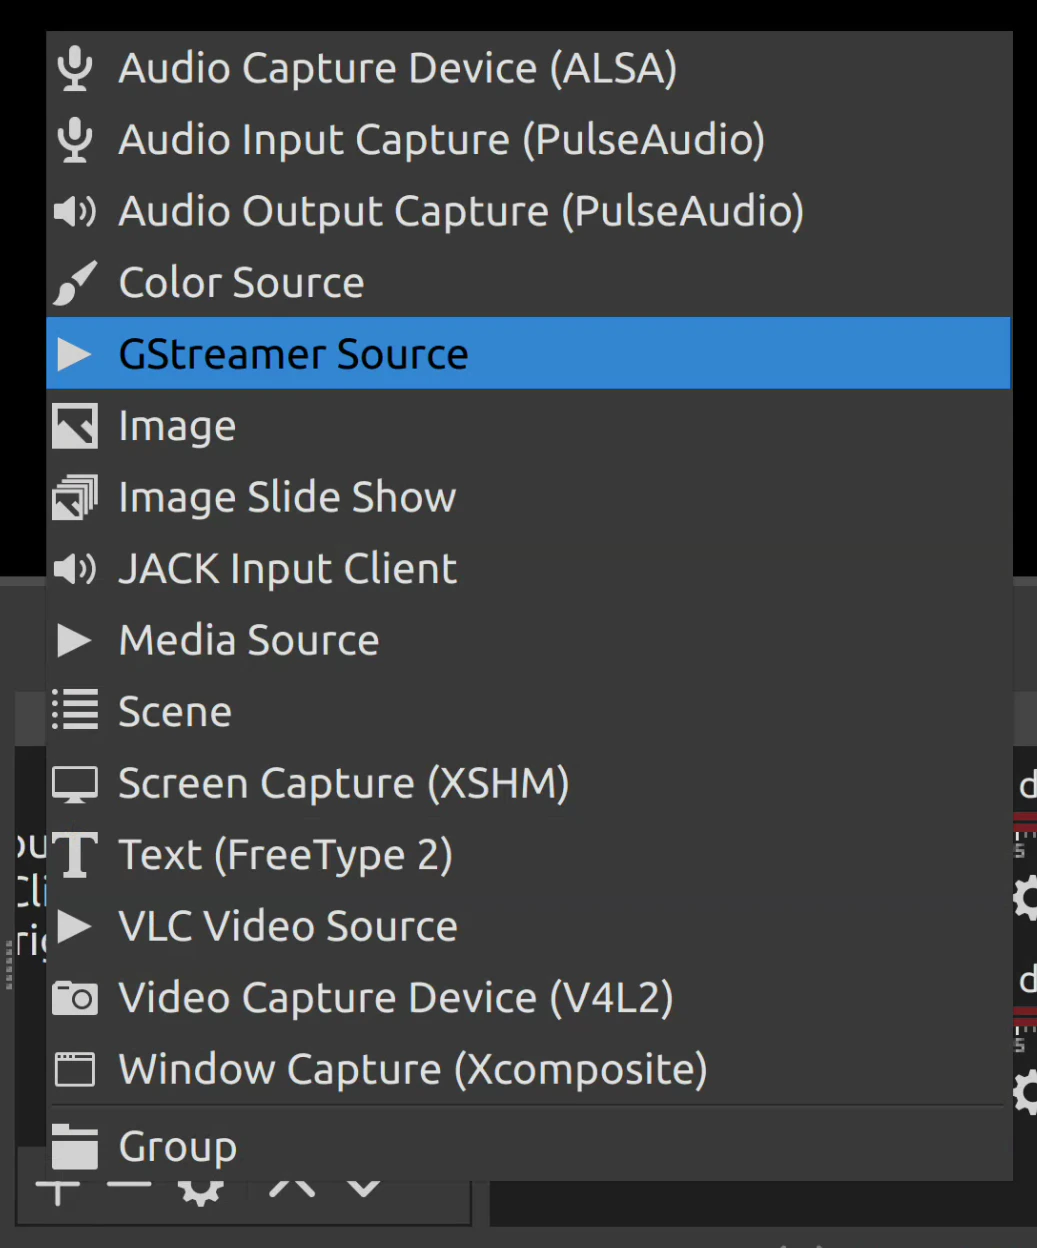
Within OBS Studios, under the `Sources` tab, press the `+` button and add a GStreamer Source.
After that, click `OK` on both windows and you should be ready to go!
You should now have GStreamer setup and ready for next steps!
To verify the GStreamer setup, open `CMD` and run the following:
```sh theme={null}
gst-launch-1.0 --version
```
This should result in an output like:
```sh theme={null}
gst-launch-1.0 version 1.16.2
GStreamer 1.16.2
https://launchpad.net/distros/ubuntu/+source/gstreamer1.0
```
Download the latest plugin build [here](https://github.com/fzwoch/obs-gstreamer/releases/).
From the `.zip` file extract and locate the `obs-gstreamer.so` file within the `linux` folder.
In another file explorer, locate the `obs-plugins` folder, or run this command in terminal to grab the path:
```sh theme={null}
sudo find /usr/lib -name "obs-plugins" -type d
```
This is likely to be similar to `/usr/lib/x86../obs-plugins`.
Move the `.so` file into the `obs-plugins` folder, or from the terminal, run:
```sh theme={null}
sudo mv ~/Downloads/linux/obs-gstreamer.so /usr/lib/x86_64-linux-gnu/obs-plugins/
```
In this case the location of my `obs-gstreamer.so` is `~/Downloads/linux/obs-gstreamer.so`, be sure to replace it with the path where you extracted the `obs-gstreamer.so` file.
Remember to replace the `/usr/lib/x86../obs-plugins` with your `obs-plugin` folder path as well.
Restart OBS Studio should you have it running.
Download the latest plugin build [here](https://github.com/fzwoch/obs-gstreamer/releases/).
From the `.zip` file extract and locate the `obs-gstreamer.dll` file within the `windows` folder.
In another file explorer, locate the `obs-plugins\64-bit` folder (or whichever bit size you installed)
This is likely to be similar to `C:\Program Files\obs-studio\obs-plugins\64bit`.
If you can't find it, right-click your OBS Studio shortcut on the desktop or Start Menu, select `Open file location`, and navigate up one level to the main `obs-studio` folder, where you'll find the `obs-plugins` folder.
Move the `.dll` file into the `obs-plugins\64-bit` folder.
Windows will likely ask for Administrator permission to move files into C:\Program Files. Click `Continue` or `Yes`.
Restart OBS Studio should you have it running.
The process from here is pretty much identical across operating systems.
Within OBS Studios, under the `Sources` tab, press the `+` button and add a GStreamer Source.
 Under `Create new` name it whatever you'd like and confirm.
You'll next be prompted with a window like this:
Under `Create new` name it whatever you'd like and confirm.
You'll next be prompted with a window like this:
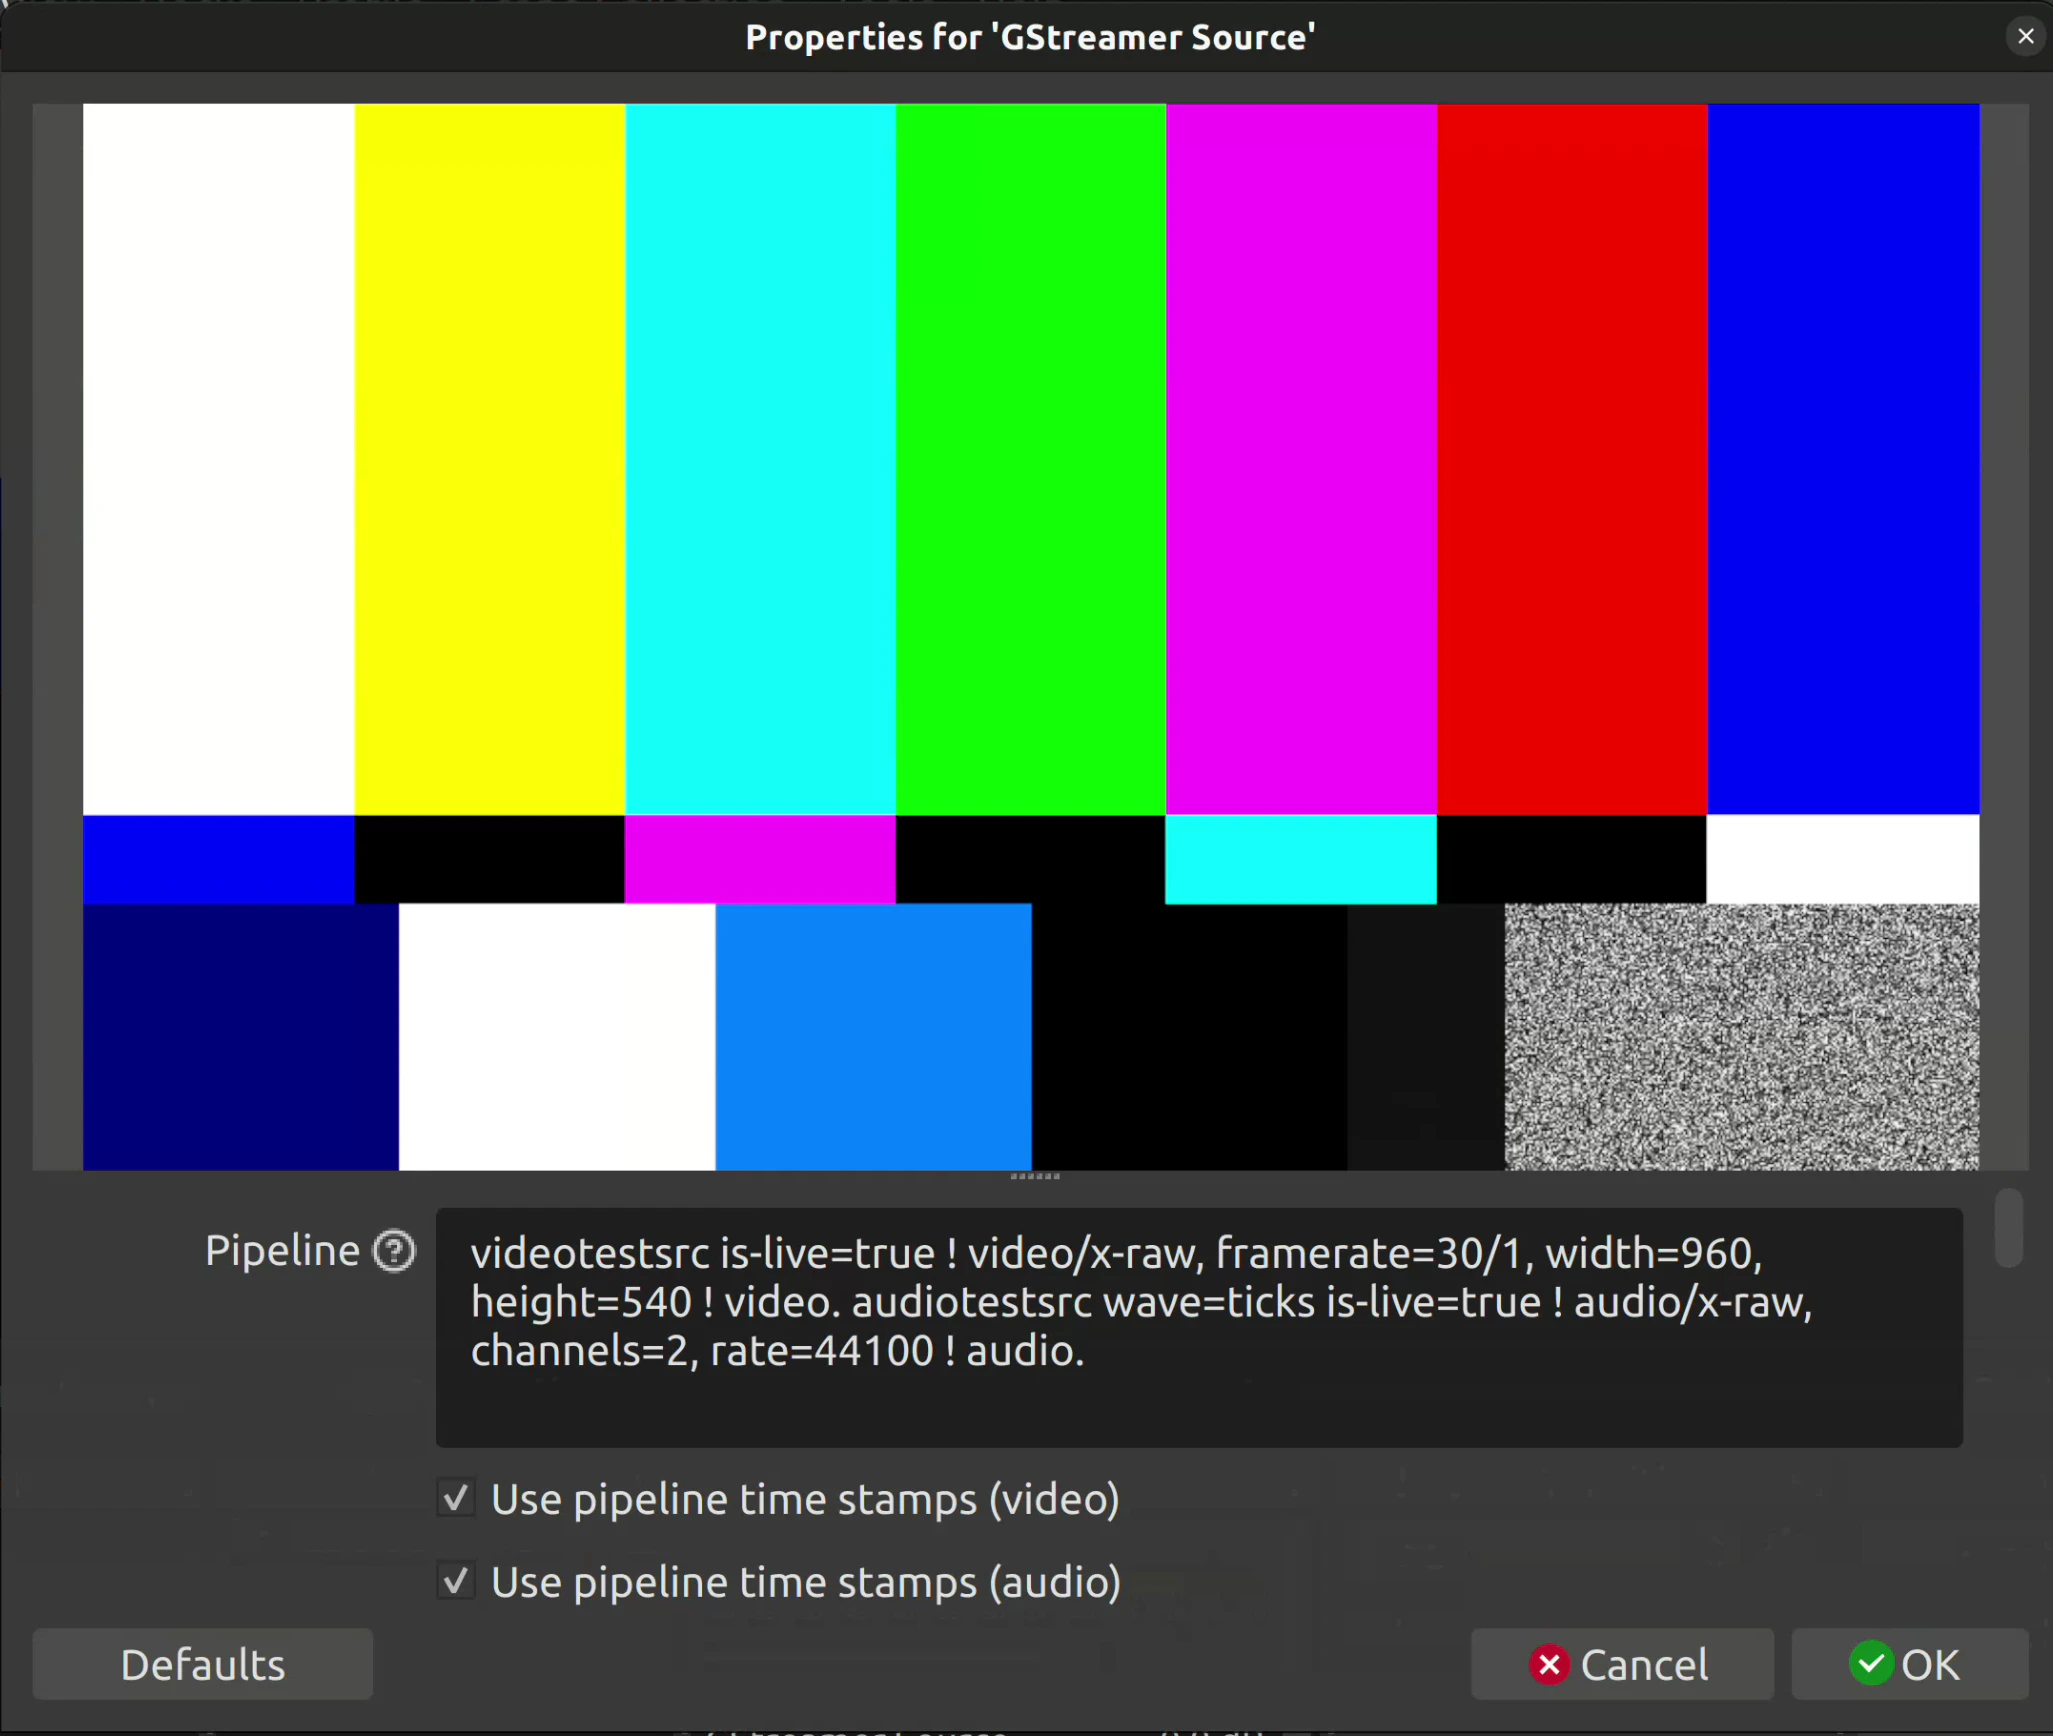 Within the `Pipeline` input, replace the existing code with:
```sh theme={null}
udpsrc port=5600 ! application/x-rtp,media=(string)video,clock-rate=(int)90000,encoding-name=(string)H264 ! rtph264depay ! avdec_h264 output-corrupt=false ! videoconvert ! video.
```
Replace the `5600` in `port=5600` with the port being streamed to from dweOS 2.
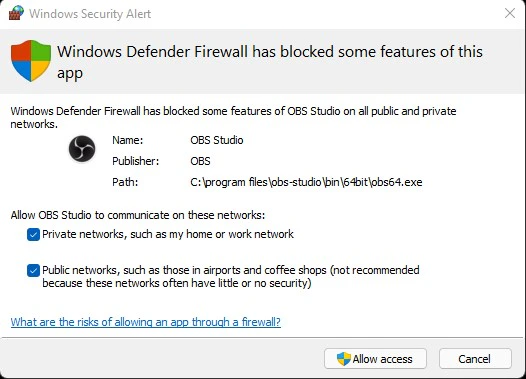
Windows may prompt you with a warning, and in that case, please enable OBS for both private and public networks
Within the `Pipeline` input, replace the existing code with:
```sh theme={null}
udpsrc port=5600 ! application/x-rtp,media=(string)video,clock-rate=(int)90000,encoding-name=(string)H264 ! rtph264depay ! avdec_h264 output-corrupt=false ! videoconvert ! video.
```
Replace the `5600` in `port=5600` with the port being streamed to from dweOS 2.
Windows may prompt you with a warning, and in that case, please enable OBS for both private and public networks
 If you would like to add more than one stream, simply repeat from step `5`.
Remember to replace the port number as specified in the previous step!
More streams should show up on the main window of OBS. You may click on the video display to resize to your preference.
Here is an example of a setup with 3 exploreHDs!
If you would like to add more than one stream, simply repeat from step `5`.
Remember to replace the port number as specified in the previous step!
More streams should show up on the main window of OBS. You may click on the video display to resize to your preference.
Here is an example of a setup with 3 exploreHDs!
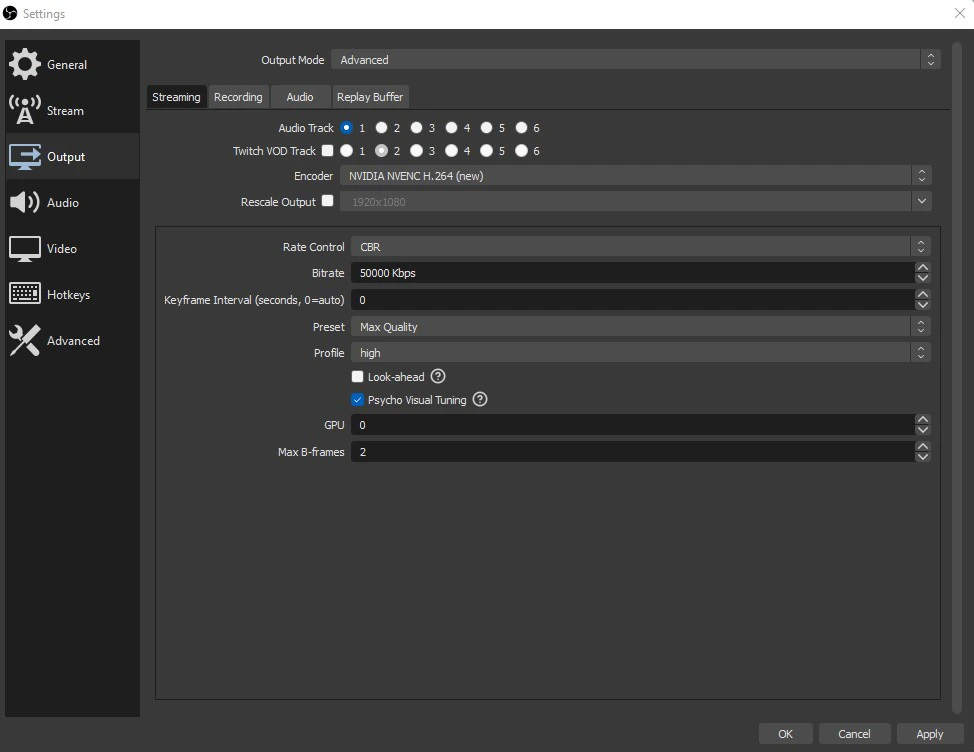
 For optimizing the setup, please navigate to `File > Settings > Output`.
Within output, set `Output Mode` to `Advanced` to access additional settings.
Given each camera is set to 10Mb/s as the default bitrate, the streaming and recording should match that. In the case of 3 cameras, providing at least 30Mb/s of streaming and recording bitrate should provide you with high quality.
For optimizing the setup, please navigate to `File > Settings > Output`.
Within output, set `Output Mode` to `Advanced` to access additional settings.
Given each camera is set to 10Mb/s as the default bitrate, the streaming and recording should match that. In the case of 3 cameras, providing at least 30Mb/s of streaming and recording bitrate should provide you with high quality.
 Wonderful! You should now see the streams configured with OBS Studio.
Warning:
Wonderful! You should now see the streams configured with OBS Studio.
Warning:
With a 3 stream setup, this configuration will rely on a powerful GPU to run
the videos smoothly. We found that OBS is a lot more intensive to run when
compared to Discovery. Make sure your laptop is powerful enough to run it or
you can lower the resolution of some of the streams to 720p.